 In the hopes of doing some long exposure photography I wanted to get my ETX mounted
on an equatorial mount. Mike Weasner's
Mighty ETX Site Tech Tips page has many such wedges. I looked at a lot of them plus more on other
sites and stole the ideas I liked best! (See the
Mettler Wedge
in particular.)
In the hopes of doing some long exposure photography I wanted to get my ETX mounted
on an equatorial mount. Mike Weasner's
Mighty ETX Site Tech Tips page has many such wedges. I looked at a lot of them plus more on other
sites and stole the ideas I liked best! (See the
Mettler Wedge
in particular.)
Like everyone else, I wanted to overcome certain deficiencies in the Meade #884 Deluxe Tripod:
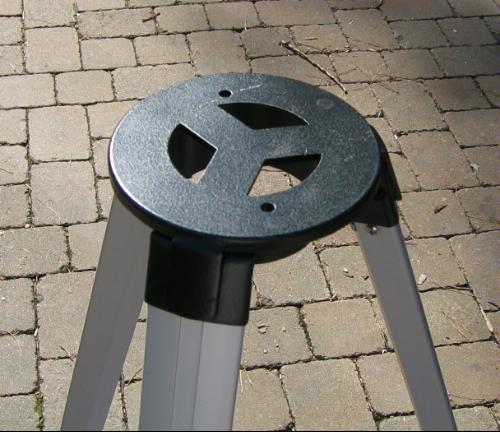
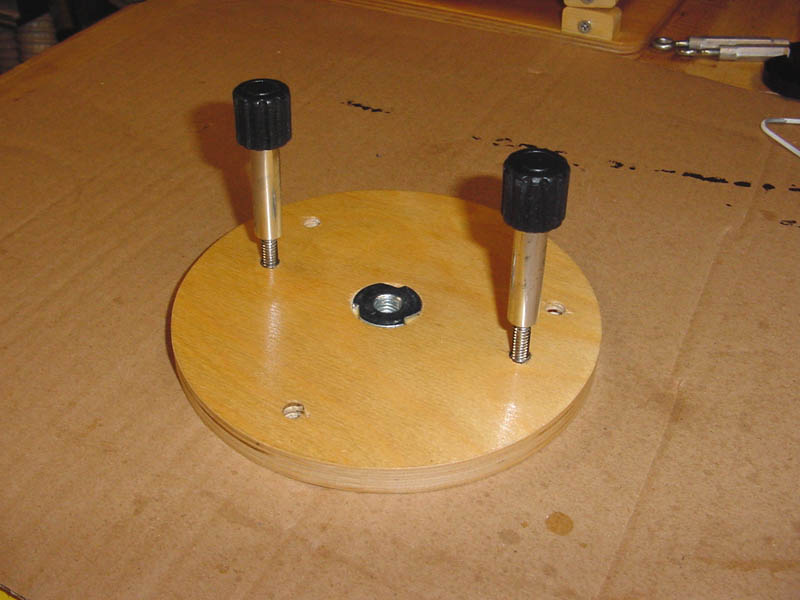
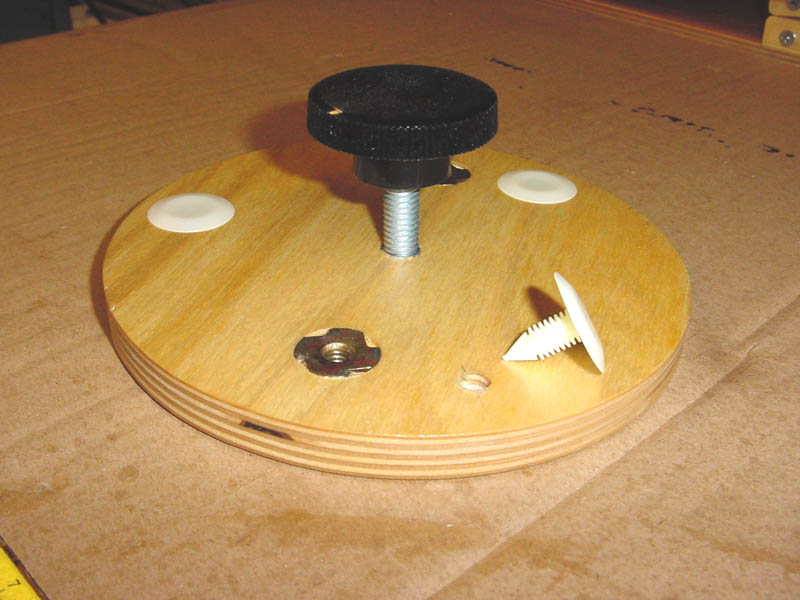
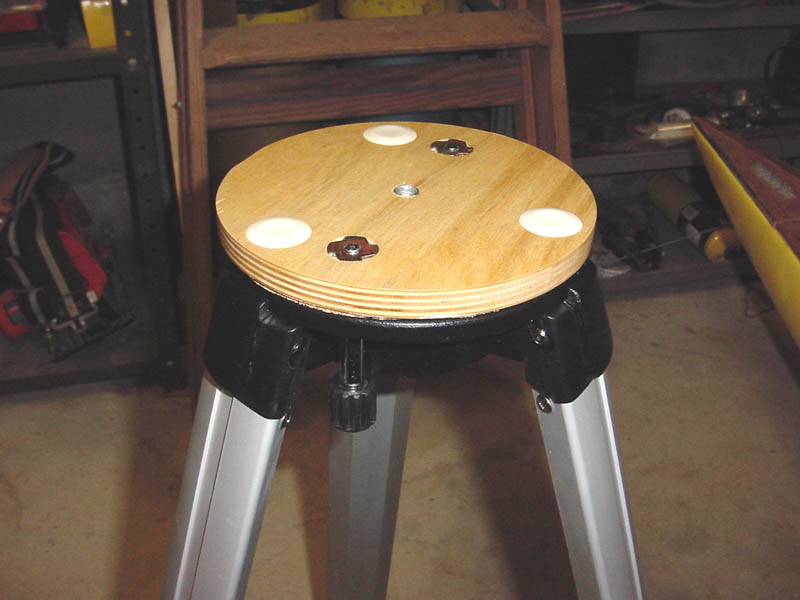
The wedge is designed to mount on the cheaper Meade #882 Standard Tripod. This sturdy mount is topped by a cast steel top plate with two holes that match the ETX base, plus two extra long screws to attach it. For my design, I first made a 6" disc and drilled two holes to match those in the steel top. Two matching t-nuts from the hardware store are inserted so the disc can be attached with the existing long bolts. In the middle, I drilled another hole and inserted a 5/16" t-nut facing the opposite way. My plywood was too thin, you should use 3/4" material to avoid having the attachment screws poke up through the top. To provide a smooth surface for the wedge to rotate on I drilled holes for three plastic auto trim pieces. They look like slippery nylon. A good hardware store will carry these or something similar.
 |
 |
 |
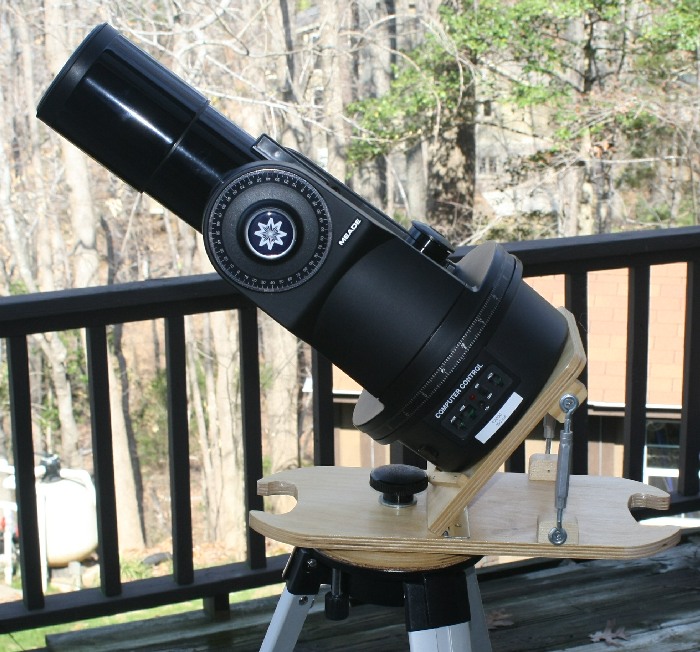
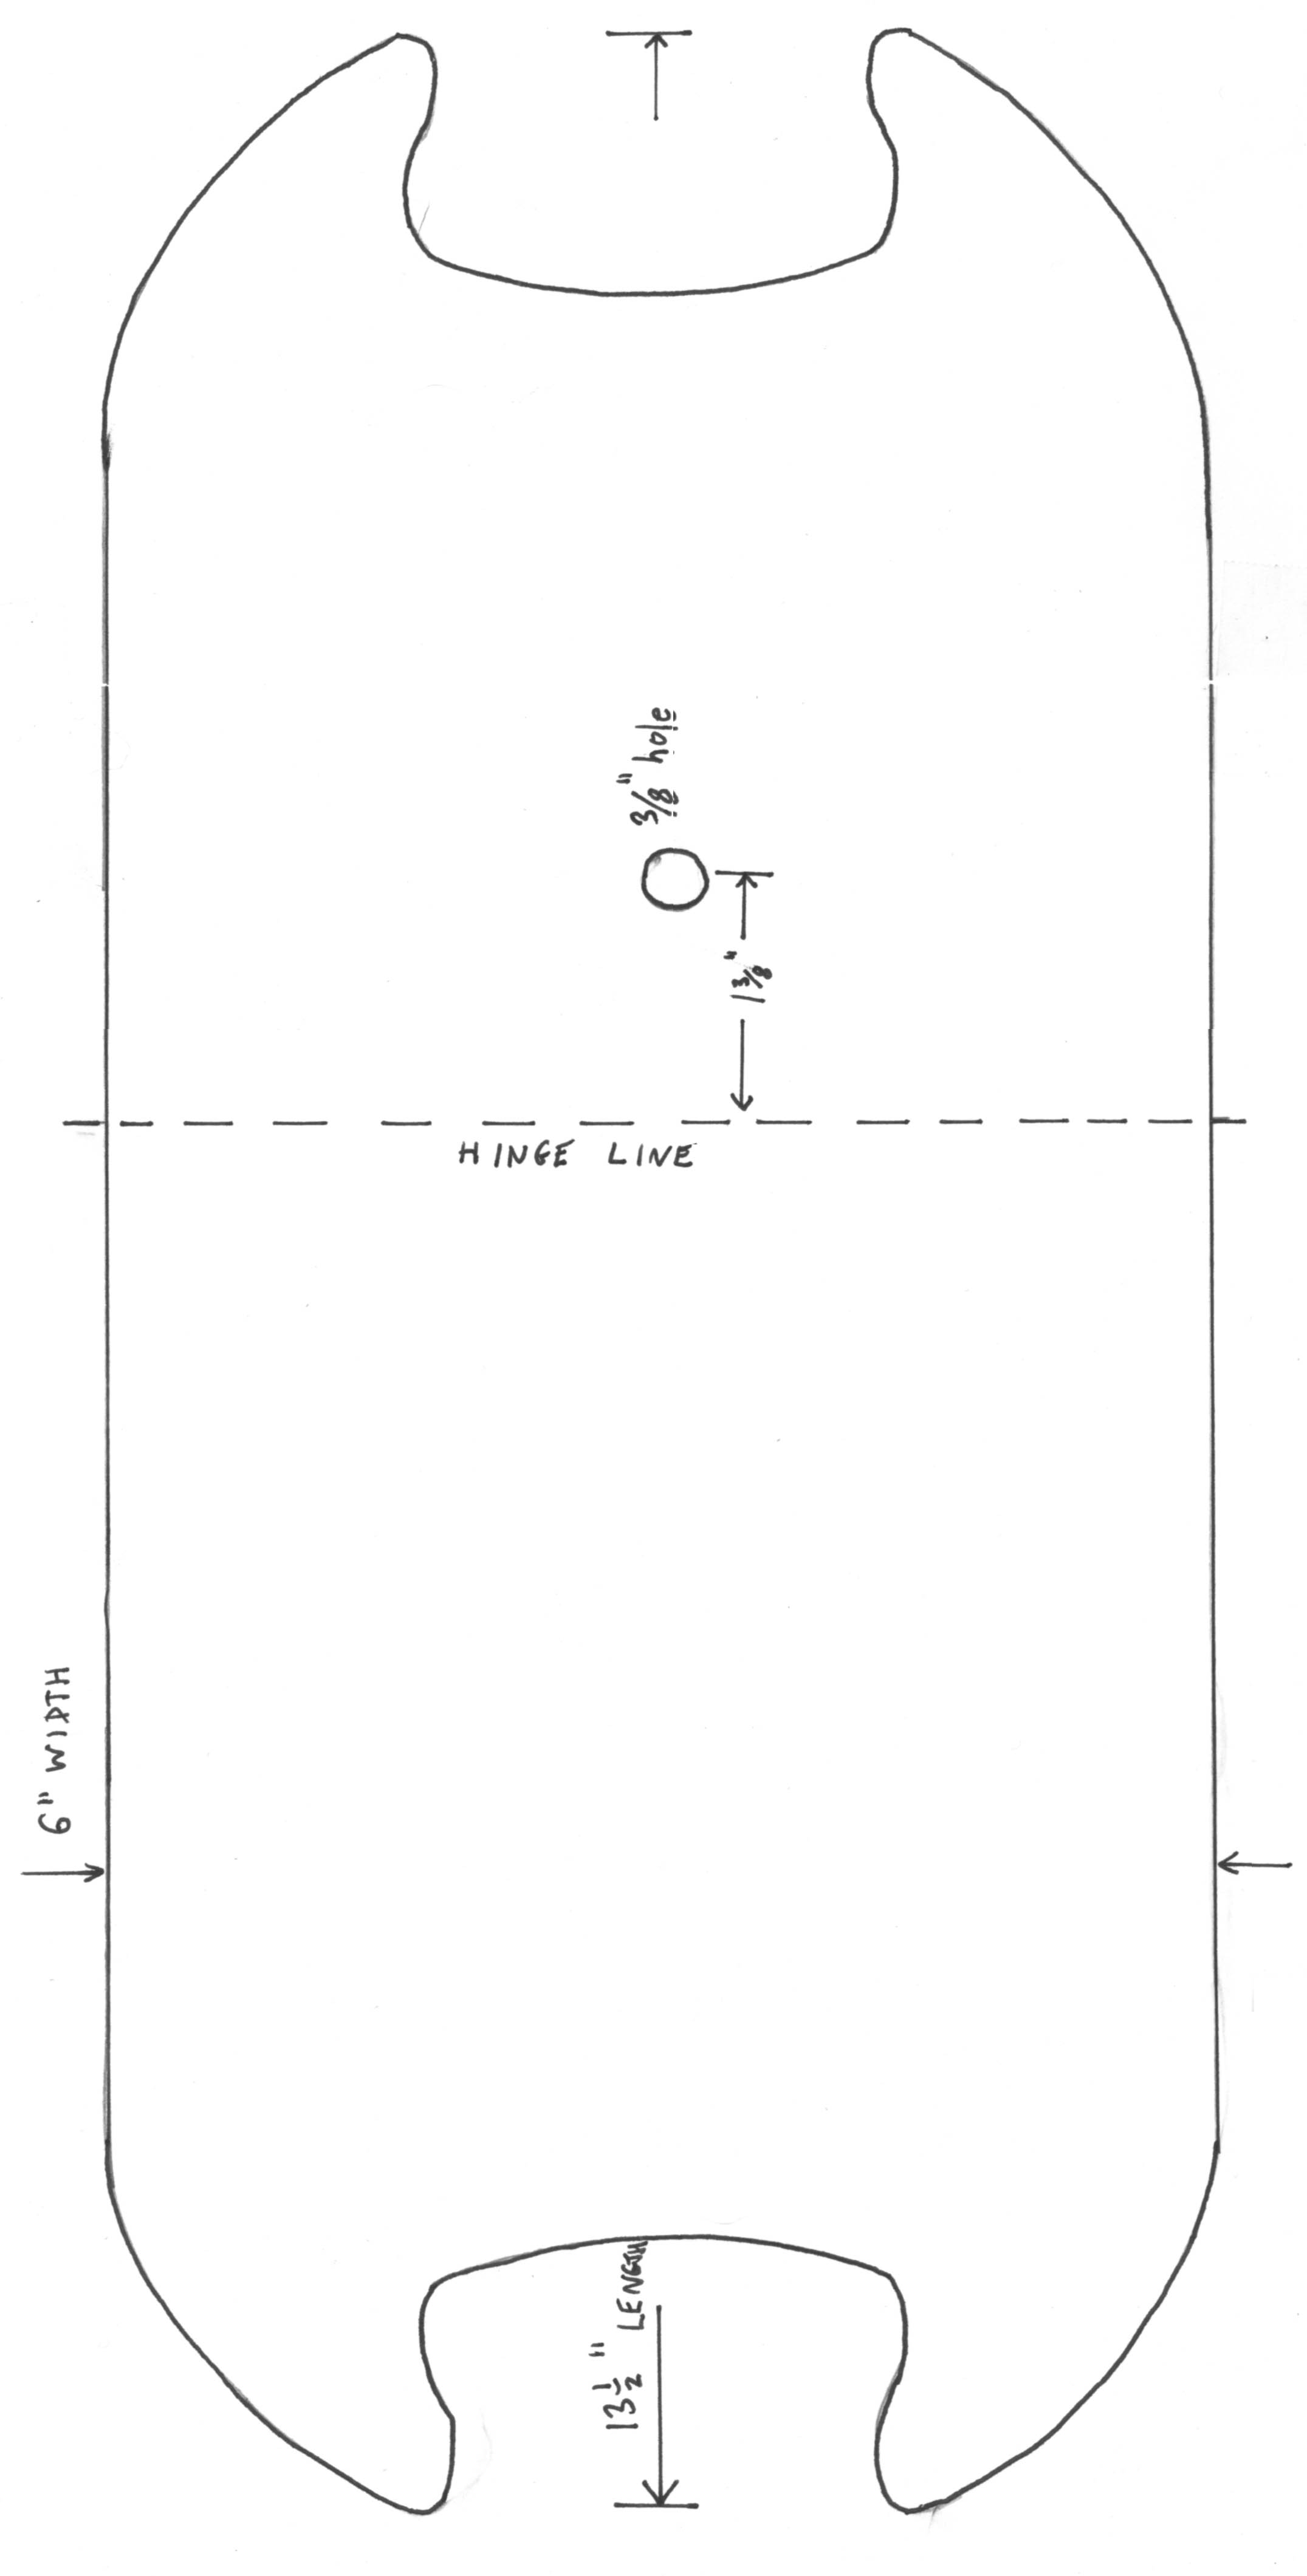
The wedge itself consists of two pieces: a horizontal piece and hinged piece. A section of continuous "piano hinge" attaches the two. Turnbuckles provide a sturdy yet adjustable mechanism for setting the angle. You'll need to adjust your design to accommodate the turnbuckles your hardware store carries and your site's latitude. I have made two cut-outs to hold the handbox, when working from either end of the telescope.
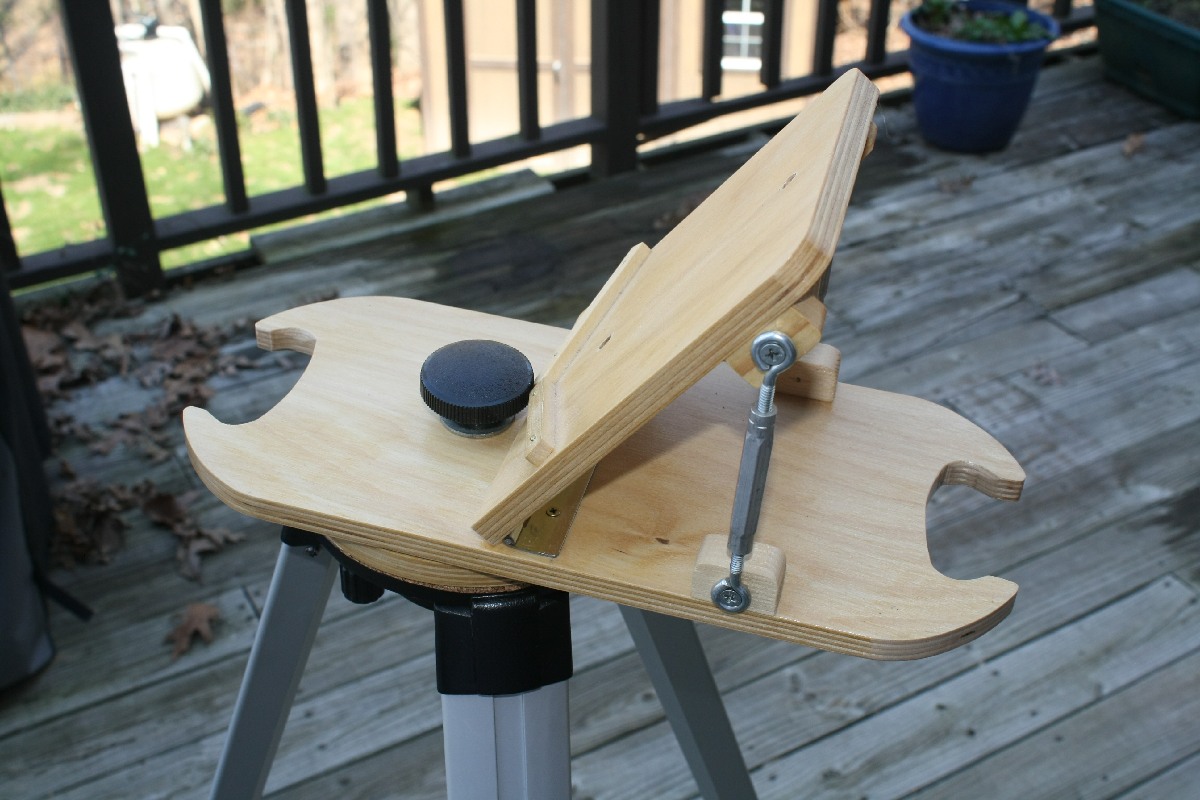
The hinge should be as close to the center hole as possible without interfering with the base
attachment knob (the 5/16" threaded knob). The ETX will be mounted on the hinged part.
For me, I had to place the ETX as low as possible on this hinged piece to try and get the mass
of the telescope centered over the middle of the mount. Be sure to leave sufficient clearance to reach
in and insert the two 1/4" attachment screws (blue).
The completed wedge assembly is shown mounted on the lower disk. It is adjusted to 54 degrees (90° minus my latitude).

Parts list:

Also in PDF form.