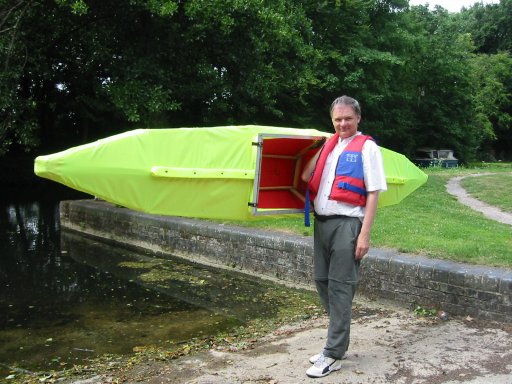
I am writing to thank you for the huge amount of work you must have done to put your pakyak design on the internet. I have this morning made the first test launch in mine on a canal in Stroud in Gloucestershire England. I am pleased to say that it didn't leak but the rear tensioning wire needs to be adjusted. I am looking nervous as this was not only my first trip in a pakyak but also the first time in a kayak but managed not to fall in though I was certainly wobbling at the start.
|
|
|
This project was started about a year ago but delayed when I discovered dry rot in my sewing room & had to replace half of the floor joists & floor boards. My other boat is also unusual, a Caraboat named Little Sue. It has wheels which stay on in the water rather than having a separate trailer, they don't seem to cause that much drag & gives the advantage of not having to park a trailer. The down side is people pointing both in the water & when towing.
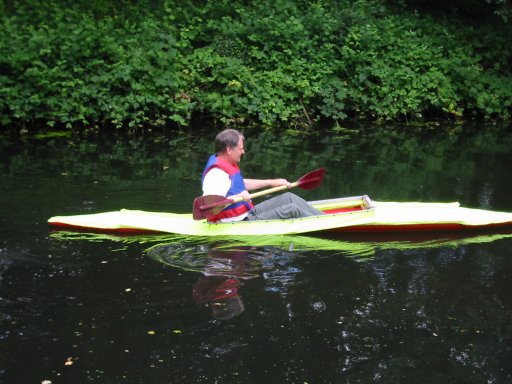
I took my pakyak to the Friday meet of the canoe club & there was a lot of interest in it. I then took it out for the longest trip so far initially finding it unstable but getting more comfortable with time. There is still a noticable sag but now I think it is due to the top strut buckling rather than the cables being too long. I hadn't fitted the popper half way down the strut onto the skin but have tonight rebuilt the stern strut as a "T" section. It is a stretched version like me. The loads on the forward strut are much less & that doesn't seem to be a problem. At the end of the session two experienced kayakers tryed it out & were both very complimentary about the handing & asked for the URL.
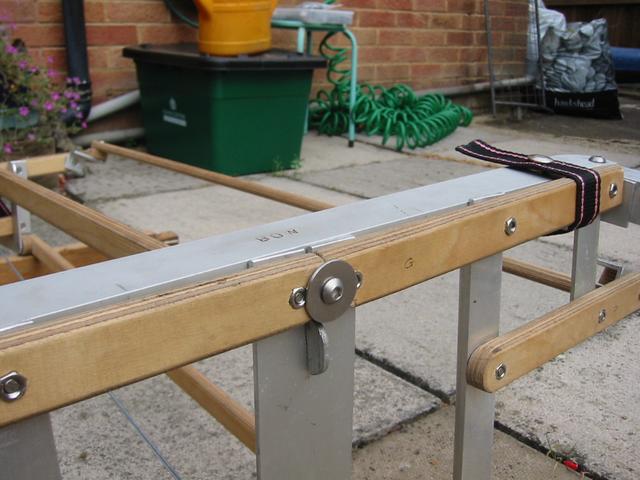
My pakyak has been built fairly closely to the plans. I frequently thought of better ways of doing things & then realised there was a very good reason for it being the way it is.
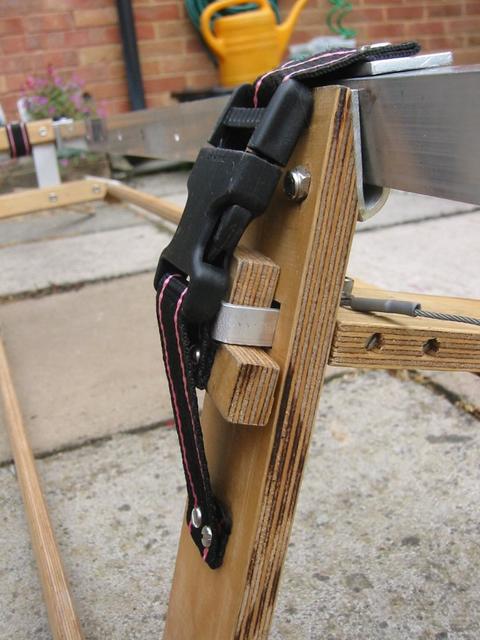
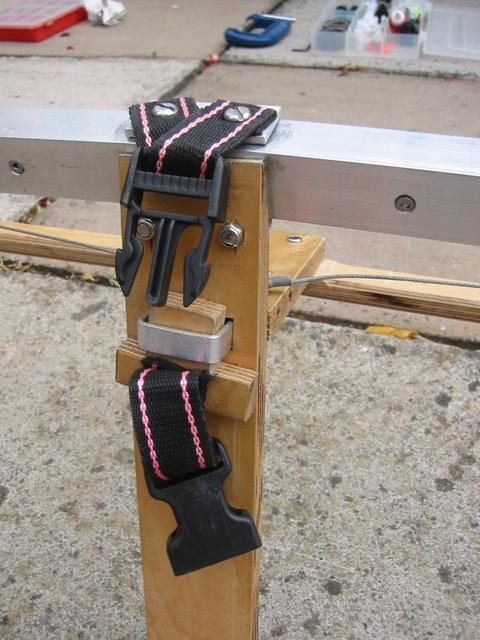
I tried to build the the centre brace as per the plan but found it impossible to bend the aluminium into a shape that my clips would fix to so compromised as shown in these photos:
|
|
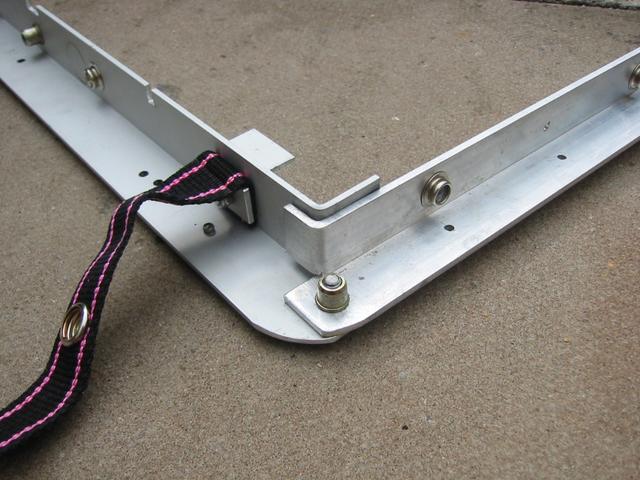
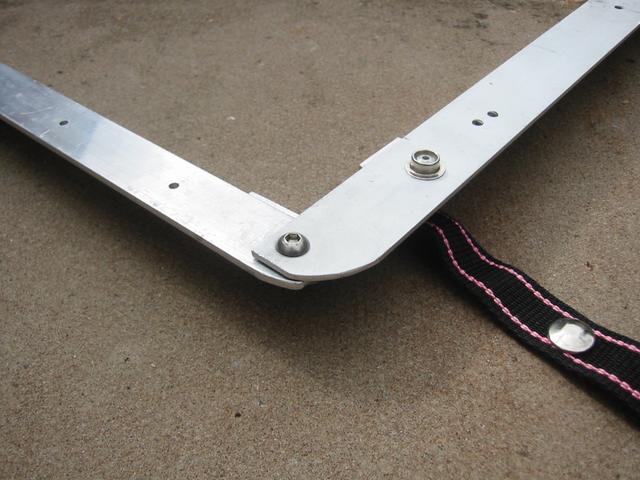
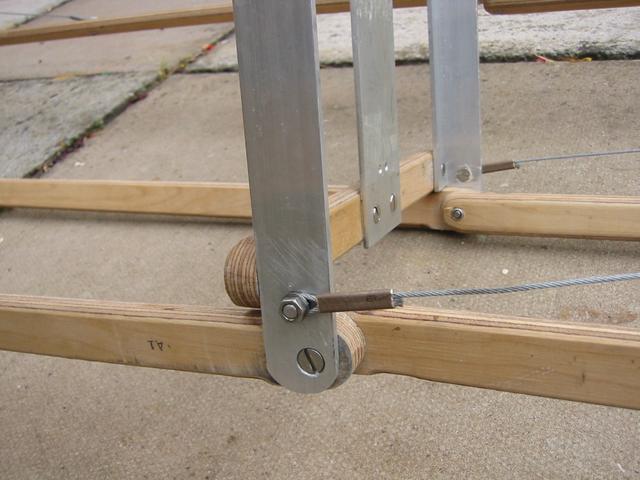
Due to not following the plans closely enough the straps round the endbrace were too far outboard & so the thrust from the top strut pushed the mid brace away from the aluminium section allowing the bow & stern to lift. I have solved this by fixing a rivnut to the aluminium section & fitting a bolt with a washer through the mid brace. The whole thing is now solid but it does mean I have to use a tool to assemble it. See photos below:
|
|
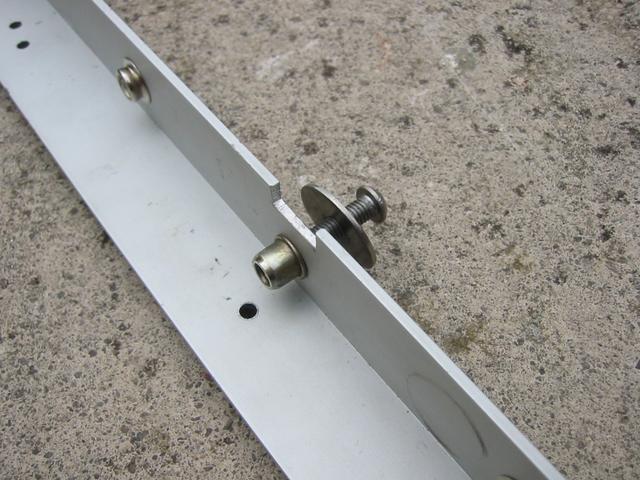
I was unsure how the parts of the gunwale held together so used rivnuts & domed cap screws to secure them. There is no need to buy the expensive rivnut insertion tool. If you hold the nut firmly but nut too tightly in a vice & then use an oiled bolt with washer to expand it.

|
|
|
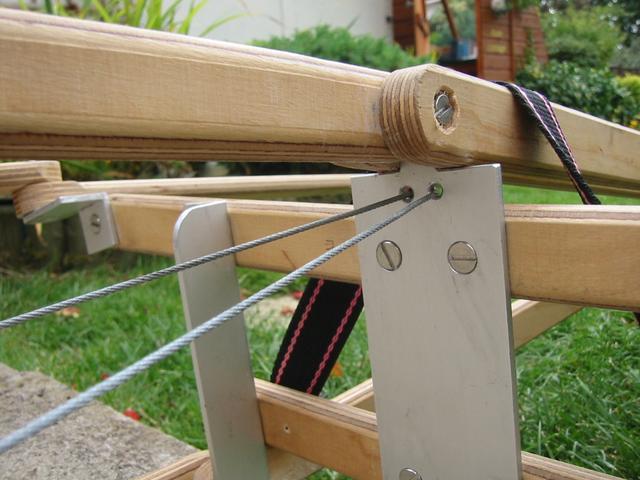
I made ferrules to secure the tension cables using hydraulic brake pipe gently squeezed into an O in a vice & the sqeezed hard when the cables were in place. see cable1,2.
|
|
I will report on the rigging soon.
Tom_Bradley@lineone.net