| MODEL BARRAGE KITE IS LIVELY FLIERExciting Fun Is Yours with This Copy of the Kites That Guard Freighters Against Bomber Attack |
|
| MODEL BARRAGE KITE IS LIVELY FLIERExciting Fun Is Yours with This Copy of the Kites That Guard Freighters Against Bomber Attack |
By VERNON B. CASE
SHIPS traveling in areas that are subject to enemy air attack often use barrage kites to carry steel cables into the sky. The cables entangle any dive bomber that ventures too close. (See P.S.M., Aug. '44, p. 125.) A full-size kite would be too much for the amateur to build and handle; but here is a model with a four-foot wing spread that has enough lift to provide thrills aplenty.
The frame--that is, the struts, longerons, and tie rods--is made of white pine. The covering material is tissue paper or thin muslin (organdy).
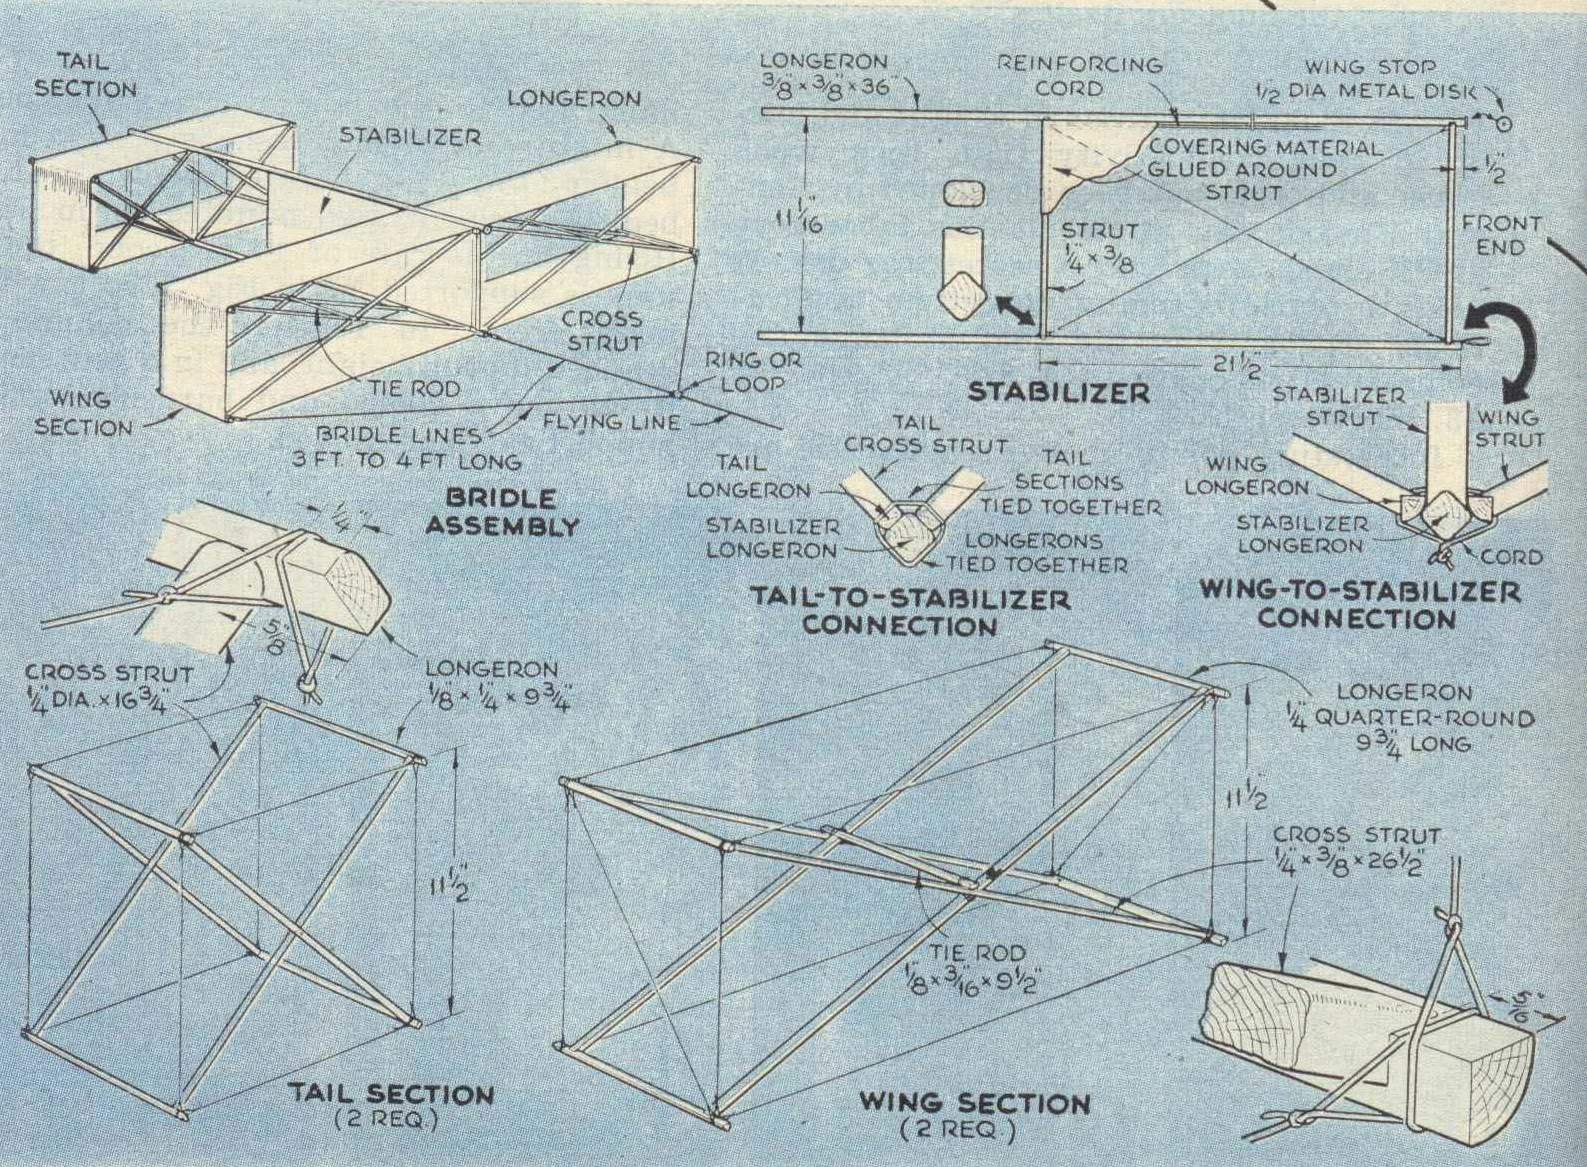
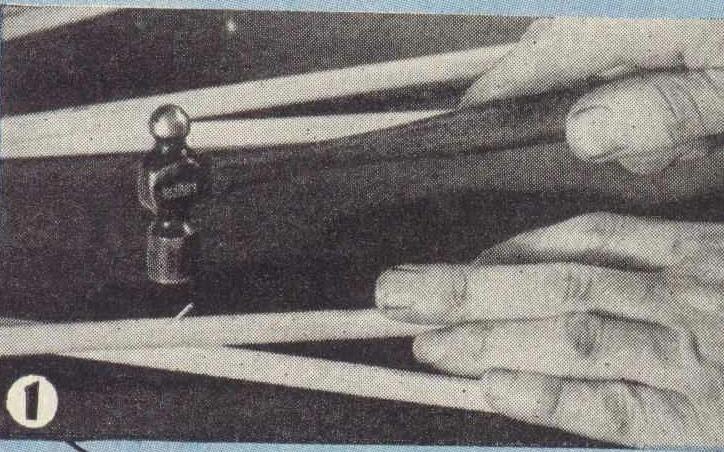
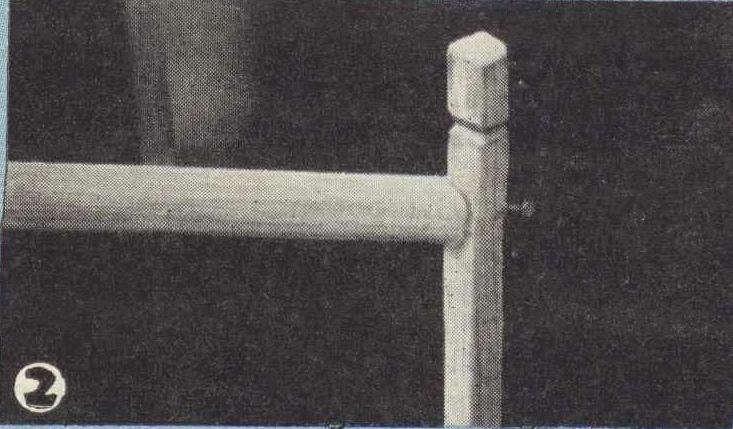
Each wing section consists of four cross struts, four longerons, and one tie rod. Mark the mid-points of these struts and fasten them together in pairs, using small nails and bending the ends over as shown in Fig. 1. Spread these pairs slightly to form X's and fasten the longerons to the notched ends with glue and small nails, as indicated in Fig. 2. An excellent adhesive for this purpose is model-airplane cement, or any similar quick-drying preparation, but you can use casein glue if you allow sufficient time for it to dry. Secure the tie rods in place with cord seizing or heavy rubber bands.
 |
 |
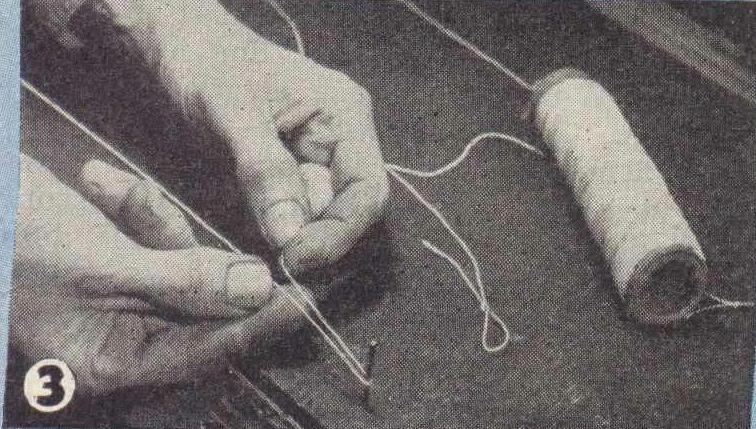
Next make the looped-end cords that hold the struts rigidly in position. Each wing section requires four horizontal, four vertical, and two diagonal lines. Use a light, strong cord. Brown waxed store string is too weak. Lightweight chalk line is acceptable, but 12 to 16-lb. fishing line is ideal. To make all the vertical lines uniform in length, use a jig consisting of two finishing nails and a board. Drive the two nails into the board so they are 11½" apart. Tie a bowline in one end of a piece of cord, leaving a loop about 1" long. Slip this loop over one nail. Pull the cord taut and double it back around the other nail, as in Fig. 3. Holding the doubled portion firmly, slip the cord off the nail and tie a bowline to form a loop like the first one. By varying the distance between the nails, you can similarly form the horizontal and diagonal ties.
 |
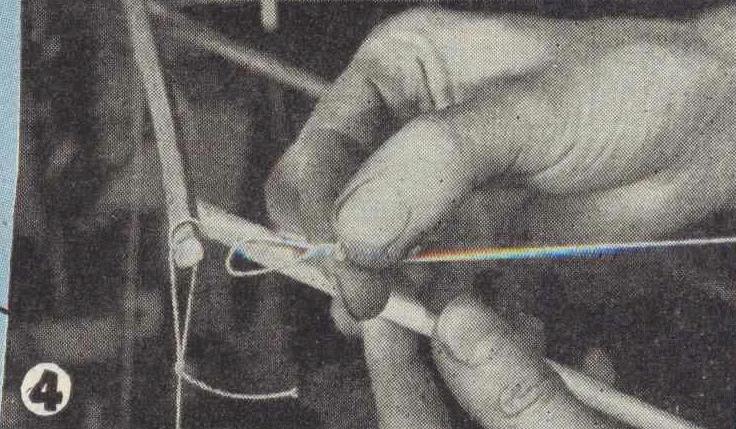 |
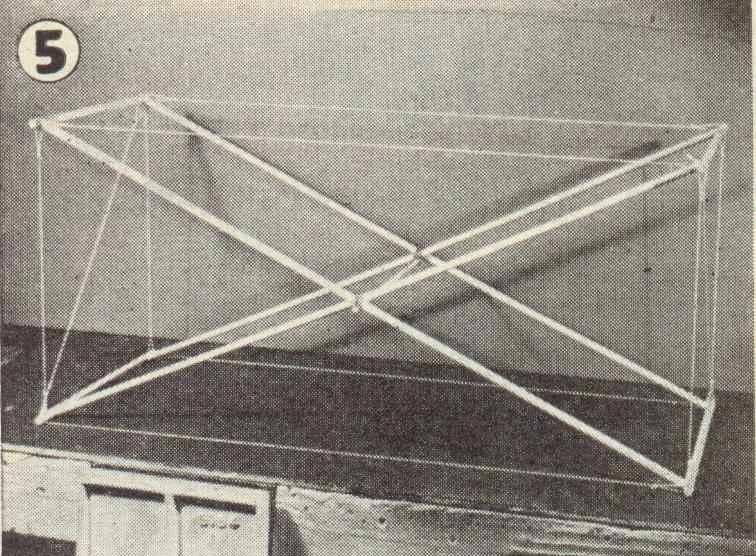
Make shallow notches near the ends of the longerons to hold the cords. Slip each cord over the proper longerons, as in Fig. 4, and secure it with a touch of glue. A completed wing section, ready for covering, is shown in Fig. 5.
The two tail sections are assembled in the same manner as the wing sections except that there are no diagonal cords or wooden tie rods. An assembled tail-section frame is shown in Fig. 6.
 |
 |
To tie the wings and the tails together, make a stabilizer section. It consists of two longerons and two vertical struts. Crossed diagonal cords stiffen the frame. Nail a small metal disk to the front end of the upper longeron to keep the wings from moving too far forward and possibly slipping off.
When the wings are put in place, the wing longerons will rest against the stabilizer longerons with the front vertical strut holding them slightly apart. Small brads driven into the stabilizer longerons serve similarly to space the trailing edges of the wings. Additional brads act as stops to prevent the wings from slipping back along the stabilizer.
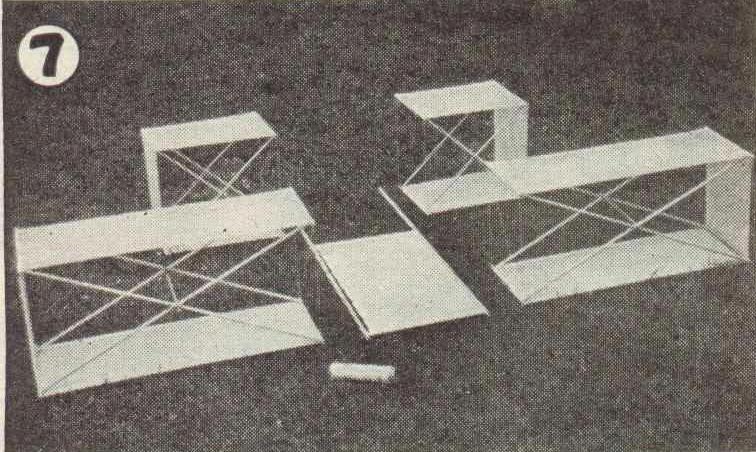
Cover the top, the bottom, and one end of each wing and each tail, and the portion of the stabilizer between the vertical struts, with paper or muslin. Cut the covering material 1/2" wider than the space it is to occupy. To cover the wings and tails, fold the edges of the covering material around the cords and secure them with glue; then glue the covers to the longerons. To cover the stabilizer, run lengths of reinforcing cord between the two tops and between the two bottoms of the vertical struts; then glue the cover to the cords and to the struts. If you use tissue paper, you can strengthen it now by applying a coat of linoleum lacquer to it. The kite should then look as shown in Fig. 7, and is ready for assembly.
 |
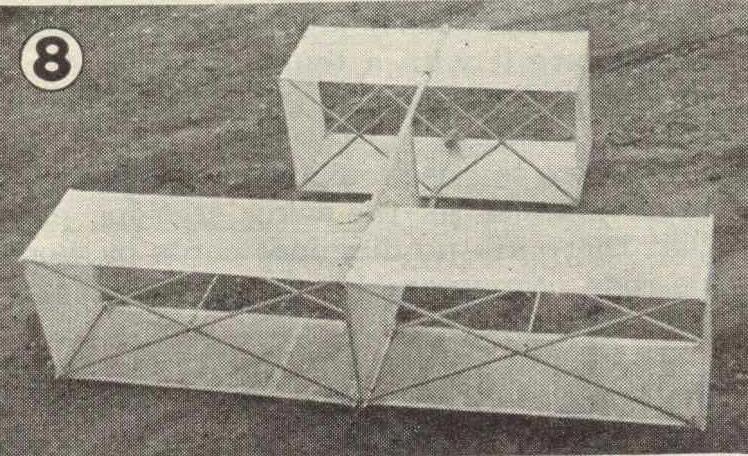 |
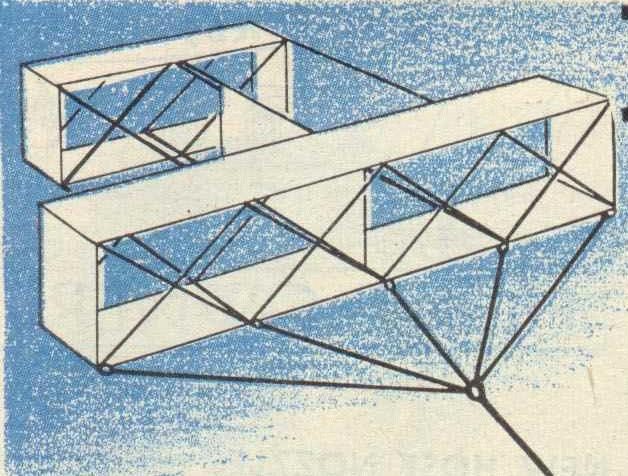
Punch small holes in the covers 1½" from the ends of the wing and tail longerons that butt against the stabilizer and reinforce them with glue or lacquer. Through these holes go 12 cords to bind the kite together. Four are used to fasten the tail sections to each other; four more pass through the same holes and tie the tails to the sta bilizer; and the remaining four are used to hold the wings to the stabilizer. The assembled kite will look like Fig. 8. It may be disassembled for storage or transportation by cutting away the 12 cords just mentioned.

|
The kite is now ready to be flown. Wait for a fairly breezy day. Stay well away from woods or other obstacles that might cause gusty air currents. Let out about 50' of cord and have an assistant hold the kite at head level, pointing it upward at an angle of about 45 deg. Hold the line moderately taut. When the breeze is good, take a short run. The kite should rise immediately and continue to climb as you pay out line. If it rides on too even a keel, it may overrun you and go into a dive. To remedy this, add weight to the tail, an ounce at a time, in the form of lead sinkers or blocks of wood that are held in place by string. The kite illus- trated showed a pull estimated at 10 to 15 lb. during the test flight, which was made in a fairly stiff breeze.
It is a good idea on flight expeditions
to take along some spare covering material,
cord, and quick-drying cement for making
emergency repairs.
