FOOTNOTES
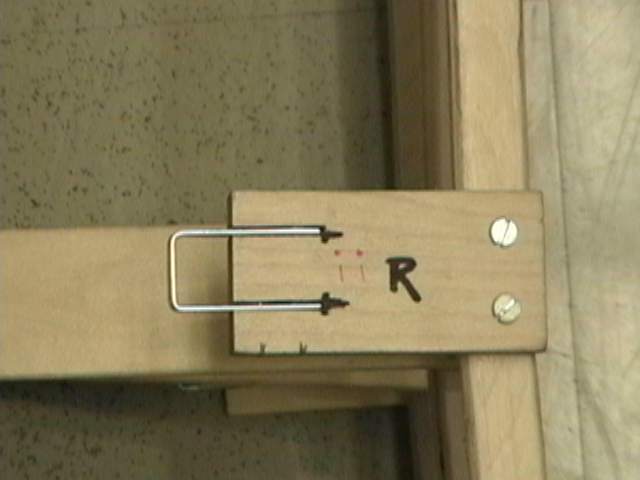
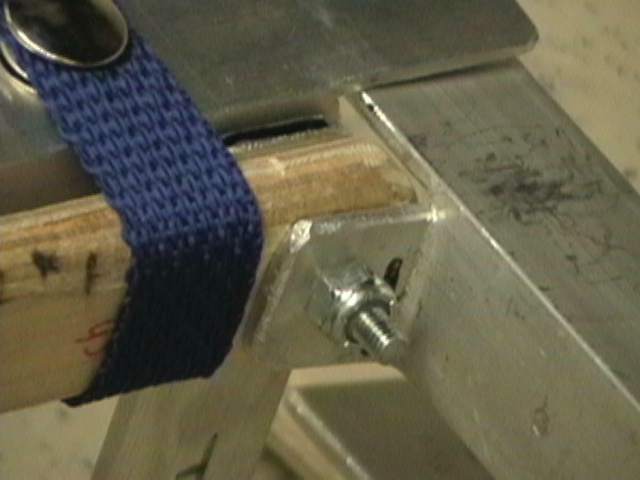
Side Catches
- The side catches that connect "I" to
"H" are made out of 1/16" aluminum formed
into a "U" shape. The "U" is more
solid and less subject to deformation than having two
"L's". Using a thin saw blade, the slots were
sawn into "I" and the catch pinned into place
using 2 pins whose location is indicated by the two
pencil marks at the bottom of "I." The
"U" catch is the same width as the catch that
the 3/4" clip normally connects with and the bottom
edges are tapered for positive engagement.
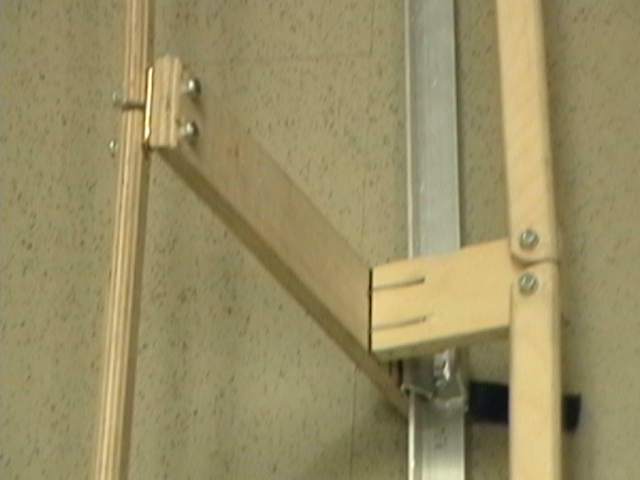
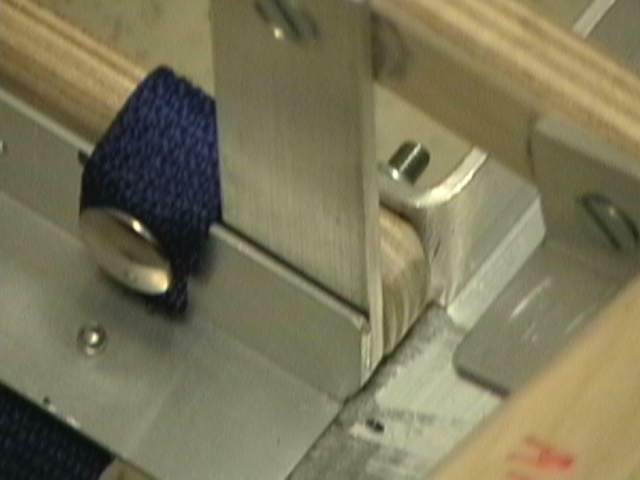
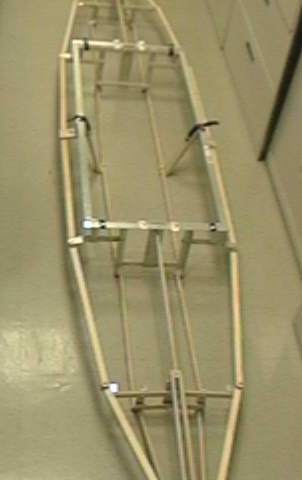
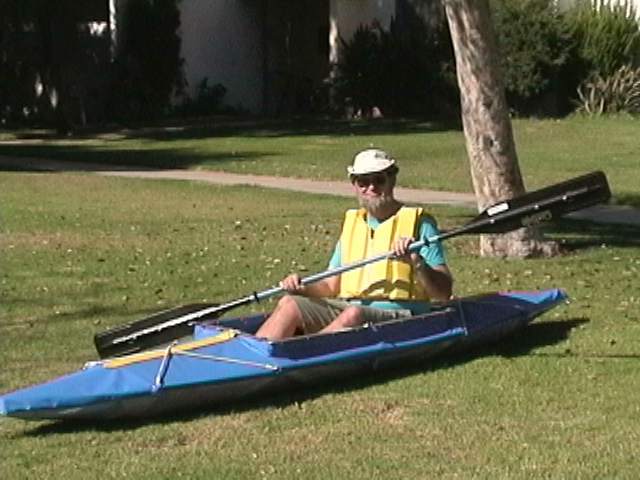
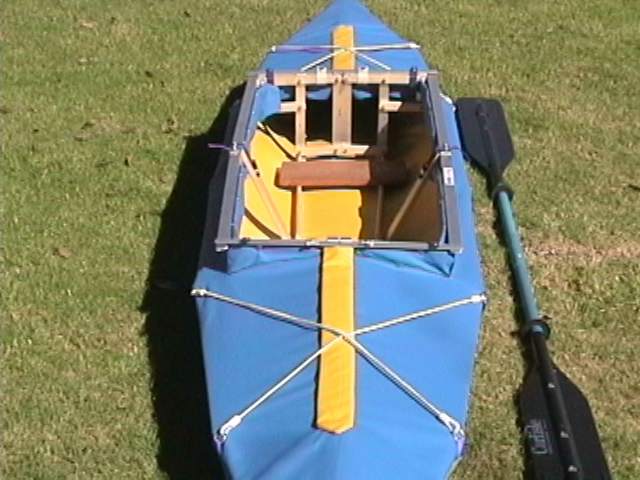
Mid Braces
Angle-Bar - The outside 2 straps (blue) were added to
the angle-bar to firmly lock the Mid-brace in position.
This just seems firmer and more stable when you place
your hands on the outer corners of the midbrace to lower
or raise your body into/out of the cockpit. To the
outside edge of the straps you'll note a tab from the
Gunwail that is screwed down to the inside of the
mid-brace. There is one on each end of the gunwail rails.
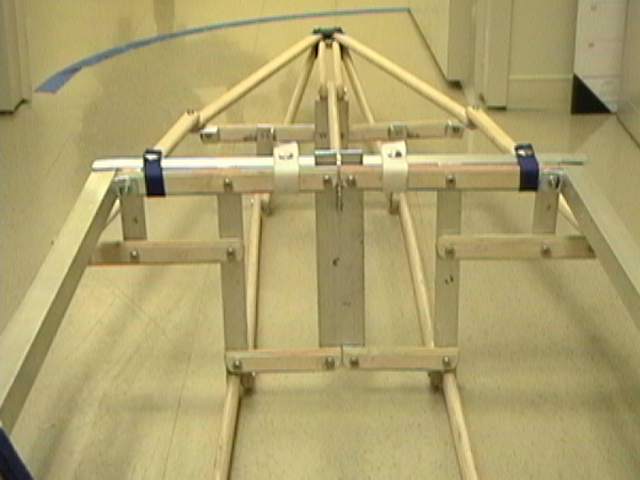
Gunwail Tabs
- In the original design the top angle-bar (mid-brace)
has tabs that simply wrap around the gunwail rails
(underneath on the sides). This allows the mid-braces to
float forward and back. It also allows a lot of flex and
coke-bottle waisting in the gunwail. So, the angle-bar
tabs were eliminated. Instead, perpendicular tabs on
the gunwail rails were created to attach to the inside
corners of the mid-brace. This requires an extra minute
or so to connect on setup, but makes the entire frame
much more rigid in overall performance. It also keeps the
bow and stern from diving when you lean back in the seat
and press forward on the mid-brace with your feet.
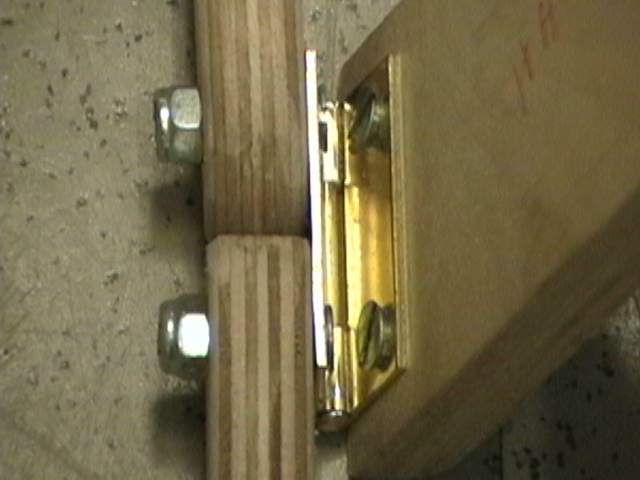
Center Hinges
- Instead of "H" being bolted directly to the
center struts, I put this hinge in between. This was
actually a solution that Jim Heter came up with when I
explained to him about the torque. Part of the problem
with the gunwails doing the coke-bottle waist thing is
the center struts being torqued (twisted) outwards to
connect with "I". Subsequently, they attempt to
return to their non-stressed state. And, pull the middle
of the gunwail rails in during the process. That works
okay with the plywood, but will not work if you decide to
make the frame out of aluminum tubing. Aluminum tubing
won't torque like plywood. And if you get it to torque,
it will start to collapse, lose integrity, and never
return to original position and shape. So, this little
hinge stops the inward pull on the gunwails and allows
you to make the frame of aluminum tubing if you so
desire.
|