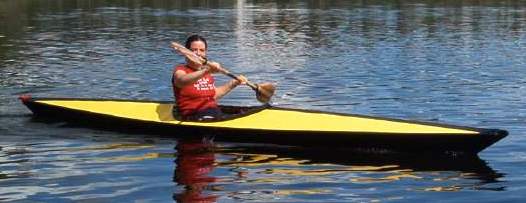
''Introduction''


Foreword
And so the unfolding dream becomes real before us, powered by our mere
heartbeats.
We move easily, unafraid of what lies below because we ourselves have
created above. Our craft forged by our hands, dreamed into existence
by our hearts.
This is why we are here. This is who we are.
This wildness. This earth.
These hands. This heart.
This life.
My life.
Unfolding across the infinite span of creation and experience.
Earth, hands and heart pulsating in unison.
Contributed by Ken Lalonde
Edmonton; Alberta, Canada
 (could be a good way to meet girls?...)
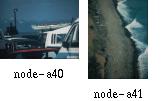
People often ask me
that question, and I still have nothing useful
to throw at them as a one-shot answer. Especially
because it only makes a lot of work. But that
bow is an important part of the picture I had
in the very first place after reading George
Dyson's book: I saw myself sailing an aluminum
Baidarka along some part of the Inside Passage.
What kept me going full power through all these
years was that picture. Then a lot of help from my
brother Gerald made it come true; he also took the
right photo at the right time, and now it occupies
some 2x3 foot on my workshop wall...
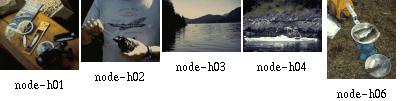
Skin On Frame Aircraft (HHM)
1991 I wasn't building Baidarkas.
Actually I flew over the Atlantic from
Germany and then drove a car from New York City to Los
Angeles and back, carrying my bicycle in the trunk
and having a ride here
and there. The lesson leant is that it is easy to carry a race bike
with you on an airplane... I just disassembled everything and put the
pieces in a solid box, the largest parts were the wheels and the bare
naked frame. The next pics show three airplanes I have seen 1991 and I
found it interesting they were an aluminum frame, covered with translucent skin.
Skin-on-frame airplanes...
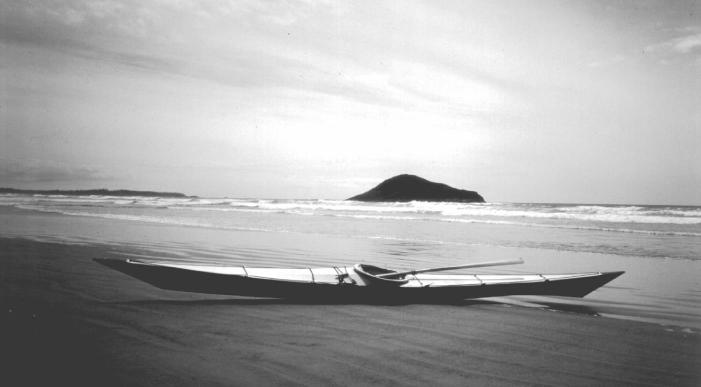
But what started me into the whole paddling business
was this Oregon Coast trip in 1992.
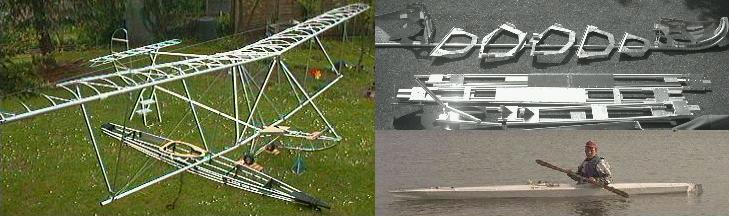
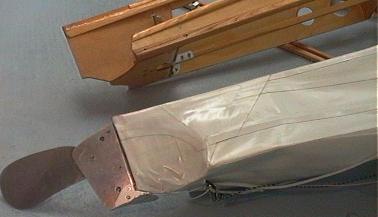
Baidarkas and Aircraft (HHM)
This slide show is about Baidarkas. But with a bias towards folding
boats and Greenland style kayaks.
''Baidarka'' is a russian word for ''small boat'' which
got used not only for Aleut kayaks but especially for Kodiak kayaks which
differ noticeably in construction.
This project was initiated by George Dyson's book ''Baidarka''.
I consider George Dyson´s three-man
kodiak Baidarkas to be his most inspiring work, together with the part of the
book that treats their history.
But what got me started into the Baidarka thing in the first place, is
the nice connection he made between Boeing aircraft, aluminum tubing, scrap yards
and modern Baidarkas. That's why I chose the pic with the airframe and Baidarka
for this page; my interpretation of the theme has always an aircraft bias towards it.
If I cannot build an aircraft due to the huge amount of time, money and
experience necessary, the next best thing to build is a Baidarka. I took
up the construction of five Baidarkas as a means of gaining experience for
making an aircraft. Especially the three folders helped in learning to take
matters more seriously.
It seems that others share the same motivation,
for an example take a look here,
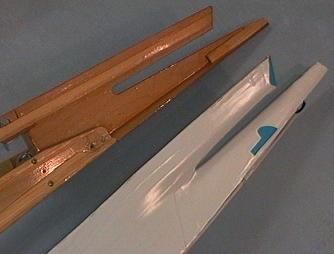
Or take a look at Geralds kayak parts, although maybe not intentionally, they
somewhat look like airplane parts as well.
My own construcion in comparison somewhat looks like
a tank or gun (better than the furniture I made, it all looks like
coffins), and the construction was nearly as much effort as a assembling
a small airplane kit.
Also, with a folding kayak, I was depending upon airlines a few times
for transportation. This is a good place to return
the favor I received from the friendly folks there.
These pages also contain travel pics, shown from
the perspective of someone carrying around 120 to 140 pounds of
gear per person...
When you take it apart does it become a kit?
Well, yes. My first designs took several hours to assemble.
Now I am somewhere at under an hour assembly time. But
basically, my folding Greenland Baidarka still is somewhat
of a construction kit.
But that is no real problem. My own design assembles a lot
better than the two-place folder I have bought. Joints are
a lot more precise and rigid, and the overall stability of
my frame is worlds apart from that of the commercial product.
So it definitely is worth the extra effort at assembling the
Baidarka. At least, there is no commercially available
folding Baidarka, and I think I know why.
I designed my foldables against the
structural strength of a rigid Baidarka. Problem is, I
only have had two rigid aluminum designs of my own
deviation from George Dyson's. This deviation makes it
difficult to give absolute numbers.
Here is more on frame stiffness measurements.
Now that I have
made a wooden foldable Baidarka, I can tell that
my very first aluminum designs were a lot less flexible
than this wooden version. This was due to my usage of
tubing with very large outside diameter (20mm). Using
18mm tubing should give better results. Using
thin-walled tubing will have the problem associated
with it that during transport the tubes will get bent
and dented.
Anyway. The Aleuts fixed their gunwales into the stem and
stern deadwood and made sure they would not move within
these joints. Gerald and I simply kept to this rule and
made sure that all the foldable longitudinals are thoroughly
interlocked to prevent them from changing their length, no
matter how thick or thin they are. This was a major design
problem for us since anything that interlocks is an attraction
spot for salt water. This tends to transform a folder into a
partly rigid boat that defends itself from being disassembled
(as mentioned in Gerald's "bloody fingers" mail).
And don't forget the skin. A good part of the
stiffness of the boat is due to the
tension of the skin - it limits the motion of
loosely assembled parts.
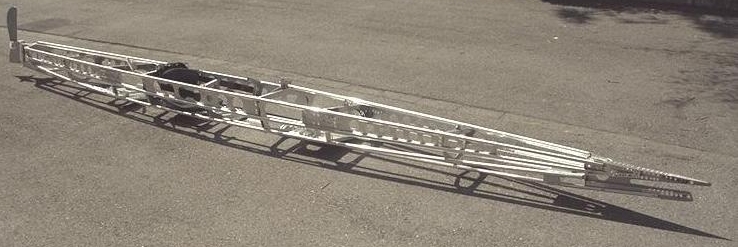
"Nevermore" Design 1996/7 (HHM)

"Nevermore" Parts (HHM)
 This is my most elaborate Aluminmum folding
Baidarka design. I won't do that again...
I still like the pics anyway.
This is my most elaborate Aluminmum folding
Baidarka design. I won't do that again...
I still like the pics anyway.
"Last Chance" Design 1995 (HHM)

In this my first folding design, a very loosely fitting
skin was laced over a very loose frame.
One could forget about the skin's contribution to frame
stability; in my case, this worked only in theory.
Maybe this is due to actually very small loads, I don't know.
Here are measurements that seem to point in the same
direction.
However,
some parts of that frame were put loosely together for
my inability to do a better design. Some parts even had
some sort of interlock that I had to cut away to be able
to assemble the boat. In essence, being outdoors gave
nature a great chance to get me streamlining my assembly
procedure.
But it was amazing what loads and abuse that frame was
able to bear. This surely is good news for any newcomer.
At least in my case even that first design was well good
enough to do the job.
LostSoul Design 1998 (HHM)
Some of the slides are large animated GIF movies.
To reduce load time I have cut the assembly process
into parts.
Just keep in mind that
the assembly happens within the skin, but is shown
without the skin for clearance.
This whole shebang is available on a CDROM, including
several other web sites. It is made by
Charles Hall and distributed for production cost.
The animated assembly movies of LostSoul:
With this design I wanted to reduce the height of the deck stringers.
I always wondered if the one-hatch Baidarka deck design really is the big
thing, partly because I am making foldable Baidarkas:
- A deck with a ridge like the Baidarka's is difficult to climb upon
after a wet exit
- I could not find a good way to attach a paddle outrigger to the deck of
my folding Baidarkas. With the Lost Soul this is no problem. The reason is
the deck ridge.
- At least I cannot lie down on the rear deck while sitting in the cockpit.
This is needed for practicing Eskimo rolling techniques. The deck ridge
is the problem.
- A flat deck allows neater hatches, both for rigid and foldable boats.
- I couldn't find a really good mounting point for my hand pump. A foldable
boat is a sad place for this, but this deck ridge...
- Mounting a compass results in an essential item placed on this deck
ridge, where it is easily ripped off. I cannot recess the compass in a
foldable hull. With a flat deck, I can place the compass within a centered
hatch cover.
Surely the Aleut people had their ways to cope with that, but I was
struggling to make my craft seaworthy. According to today's accepted
safety standards. I had to change it in order
to get a foldable design, and the result is very similar
to the Greenlanders, especially since the waterlines
of my folding kayaks come close anyway.
- I very much appreciate the Baidarka's carrying capacity. Loading the
Baidarka always was something like "Put the bag in". In comparision
to that, I have strong recalls about someone placing tiny bits of equipment
onto the paddle and then carefully inching them into the narrow hull. Something
alike the "baker man is beaking bread". And as slow. (Hi, Gerald
:) A good part of this carrying capacity comes from the Aleut
stern design, and that's why I keep it.
Well, this looks like something. I made a good rear hatch, with the
pump installed and everything, skipped that rear deck stringer
and now have a nicely fitting tilted cockpit. Seems like progress.
Here is what others have said about my
modifications to the Aleut design.
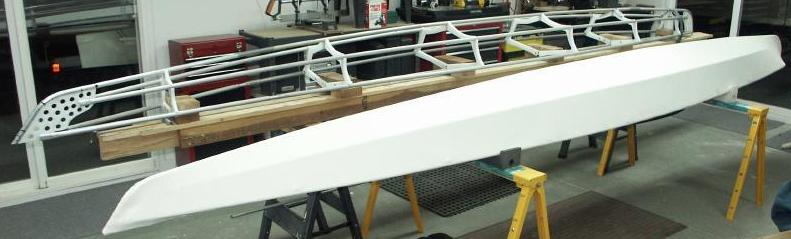
TDY-16 Design 2002 (TDY)

In order to save weight, TDY-16 is built using
3/4in X 0.035 tubing. In addition, there are 6 HDPE cross
sections (FAP-16 has seven). The HDPE
stem/stern use lightening holes, and the coaming will be
light weight fiberglass. The frame, without coaming, weighs
13.5lbs. Completed weight with 13oz.
PVC skin material should be approx. 25 lbs.
LOA - 16ft.
Beam - 23in.
Weight - 25 lbs.
Stringers - Aluminum 3/4in. X .035 Walls
Skin - PVC
This Non-Aleut design is intended as a lightweight
medium volume touring kayak. As compared to FAP-16,
it features a peaked deck to improve interior room
for the paddler as well as more storage space.
It utilizes thinner walled tubing (3/4" X .035) and
six cross sections ( FAP-16 has seven) to reduce weight.
The cross sections, coaming, and footbrace are made
from HDPE. Finished weight is approx. 26 lbs.
The skin is a sewn, one-piece Polyester (9 oz.) design,
and is coated with Neoprene/Hypalon. The hull is
covered with eight coats of neoprene, while the deck is
covered with five coats neoprene and three coats Hypalon.
Neoprene is a bit easier to apply than Hypalon. It
cures quicker, and is more durable. Hypalon has the
advantage of being easier to fold, and is available
in many different colors.
The following pages highlight only those construction
details not included with, or that differ from FAP-16:
Stem, Stern and Frame
FAP-16 and TDY-16 Frames
TDY-16 Frame
Coaming Details
The HDPE coaming is comprised of 1/4" baseplate, 1/2" coaming, and 1/8" coaming lip.
Machine screws are used to provide a secure coaming attachment.
Polyester Skin (9oz.)
The one-piece Polyester skin is sewn with nylon squidding line.
The deckridge and stem/stern are cut (seared)
with a propane cutting blade prior to sewing. This process
assures a hard edge that will not separate.
The deckridge will be cut open for the installation of lacing or zippers.
Neoprene
The frame is first waxed to insure that neoprene will
not soak through and stick to either the aluminum or HDPE.
Before coating , a heat gun is used to remove wrinkles
still remaining in the skin after sewing.
The first two coats of Neoprene are thinned with 10percent
Zylene to insure that the neoprene will soak deeply
into the polyester cloth. Subsequent coats are thinned
but to a lesser degree.
Neoprene is applied with a 3 or 4 inch brush. Use
short brush strokes and be sure not to brush the
neoprene once it starts to glaze over. That will cause
ripples in the surface. Maintain a wet edge and
move quickly along the surface. Subsequent coats
of neoprene can be applied every 30 minutes or so.
When the skin is removed, the inside hull will
receive 2 additional neoprene coats. This is not necessary,
but will insure complete saturation, and makes
for a better looking job.
Always wear a respirator, and work in a VERY well ventilated area.
Hypalon
After applying neoprene, the deck or hull can be coated with
additional Hypalon to give it a color other than black.
Hypalon cures slower than neoprene and requires a longer
wait between coats. Hypalon stays slightly tacky
for a few weeks. Adding Lacing, zippers, flaps, and deck
rigging can be done in a week or so after coating.
Wait several weeks after coating before removing the skin.
I normally wait a couple of months before folding the skin.
The main advantage of the Polyester/Neoprene/Hypalon skins
are their one-piece construction and ease of repair.
An additional coat of Neoprene/Hypalon every couple of
years will keep it looking like new.
Rub strips can be glued to the keel and chines for added durability.
Skin/Coaming Attachment
On FAP-16, the skin to coaming attachment is accomplished
by wrapping the skin under the baseplate and using snap connectors
(see here for the idea).
On TDY-16, the skin is attached directly under the coaming with
machine screws and recessed snap connectors.
This is a cleaner installation, but the other method is easier.
Finish
At this stage, all that is left is to install lacing or
zippers, attach the flap, and deck rigging.
The seat is a gunwale mounted sling type similar to that
in FAP-16. A paddling report will be added later.
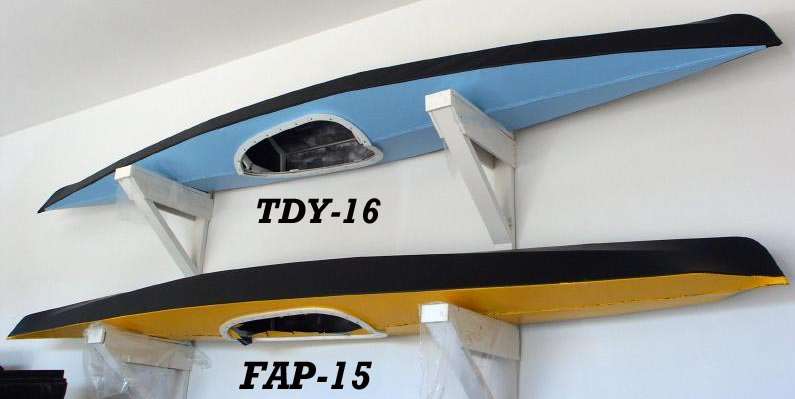
FAP-15 Design 2002 (TDY)

Based on FAP-16, this smaller/wider version was designed
to use the minimum of materials possible while still producing a
lightweight, strong, and durable folding kayak. This
has been accomplished by using (5/8" X .049) tubing in
place of the normal 3/4", and also by
having only four cross sections, instead of FAP-16's seven.
The displacement figure of 190lbs is at the 4.5" waterline.
Final displacement at the gunwales is
in excess of 600lbs. The finished kayak weighs about 24lbs.
The cross sections, backrest and footbrace are made of HDPE.
The skin is a sewn, one-piece Polyester design. Coating are Neoprene/Hypalon.
The deckridge is considerably taller than FAP-16 to provide
greater room for comfort and storage.
Personally, I prefer lower, flatter decks, but wanted to
provide an alternative for other builders.
This Aleut based frame is made of 5/8" tubing. Though
flexible, it showed no signs of deflection in the water.
The HDPE cross sections allow for ease of construction
and assembly. The tubing size and number of cross
sections are the same as the Feathercraft
Kahuna (14'6" LOA). Tubing size can be changed to 3/4"
if desired during construction.
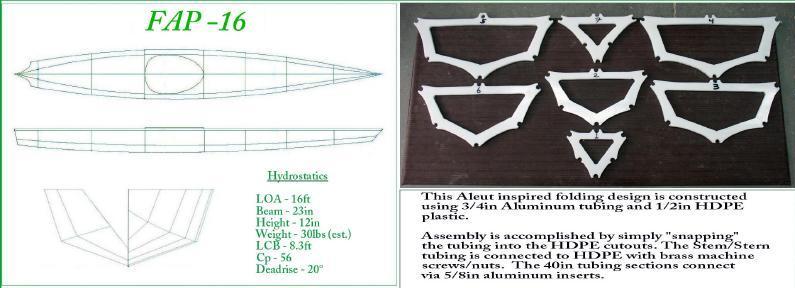
FAP-16 Design 2002 (TDY)
The design goals for FAP-16 were to make the kayak easy to build (Under 100 hrs.),
Easy to Assemble (Under 30 Min.), and light weight (under 40lbs). Above all, Tom wanted this
boat to perform as well as any non folding skin kayak.
LOA - 15ft. 8in.
Beam - 23in.
Weight - 35 lbs.
Stringers - Aluminum 3/4in. X .049 Walls
Skin - Polyester/Hypalon
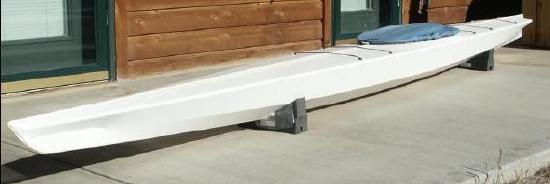
BIF Design 2002 (TDY)
This kayak is loosely based on the CNM-12212 single chine Aleut
design Tom has built some time ago. It is very fast
for a 16ft kayak and is much more stable than it looks.
With 28deg deadrise and very generous rocker, it tracks
beautifully but can carve a quick turn. It compares
favorably with his
Lowie Museum LM2-14886 in
stability and turning, but is faster.
This will make a great workout boat.
LOA - 16ft 2in.
Beam - 20.5
Weight - 25lbs.
Construction Time - 75hrs.
CNM Design 2001 (TDY)
Tom writes:
I've just recently completed a new kayak after a few years inactivity.
The design is a hard-chine Iqyax (CNM-12212) that I built based on a simplified
version of George Dyson's method utilizing aluminum stringers with plywood cross-sections.
The skin is 8oz nylon coated with several coats of neoprene/hypalon.
Length - 17.5 ft
Width - 17.5 in
Weight - 28 lbs.
Cp - .61
With 33 degrees of deadrise and very generous rocker, it is visually very
interesting and has great performance to match.
It lays on it's side up to the gunwales when resting unoccupied on the water.
Seems to support the Veniaminov and Sauer accounts of the Iqyax form.
Various Designs (TDY)


Tom has built approximately 16 boats since 1975, with the first
eight being woodstrip/fiberglass sea kayaks. Of that group, two have been
Aleut designs constructed from David Zimmerly's offsets in his book
"QAJAQ". He built them to scale but made changes to the deck shape.
In addition, Tom built a woodstrip version of George Dysons double .
Having grown a bit tired of building woodstrips, he decided to try a
hand at non folding skin boats. He first made three George Dyson singles,
the first two of all wood construction, and the third using wood cross
sections with aluminum stringers.
He immediately realized that these were more seaworthy than were the woodstrip
hulls. The flex in the skin and the concave skin shape between stringers,
really slowed down the roll rate as well as allowing the hull to conform to
the waves.
The first folder that Tom has made, about 1993 or 94,
is a folding wooden (pine) version of a Dyson single.
Skin is Nylon/Neoprene/Hypalon. Time to assemble - Forever !
His second folder was an
Aluminum/Wood Dyson Double (1996).
Third was an Aluminum/Wood single (1997).
Fourth was an Aluminum/HDPE single- FAP-16(2002)
Fifth is an Aluminum/HDPE single - TDY-16(2002).
Sixth is an Aluminum/HDPE single - TDY-15(2002).
Above is a photo of the folding single that Tom was building 1998(?).
You will notice a striking similarity to the "Feathercraft" designs.
Since he paddles a Feathercraft K-Light,
the similarity is no accident. You will also notice
that there are very few parts. This boat follows the KISS principal. ( Keep It
Simple Stupid)!
The tubing is all 3/4 in. Aluminum 6061/T6 thin wall. The tubes are attached
to the Cross sections using "L" shaped brackets pop riveted to the tubes. The
frame weighs about 15 lbs and takes only a few minutes to assemble. The frame
has a single stretcher bar at the keel. The skin will be made of 14 oz.
pre-shrunk nylon. The material will be coated inside and out with three coats
of black Neoprene. The deck will receive additional coats of white hypalon
to provide a light color. The boat is 15.5 ft (4.73m) long by 24 in. (61cm)
wide.
Tom plans to use zippers along the deck ridge for closure and sewn
in sponsons to assure a tight fit and to provide additional stability.
At least in my case, the zipper/sponsons solution has worked more than once.
Just take care.
They keep getting lighter, easier to build, and quicker to assemble.
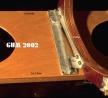
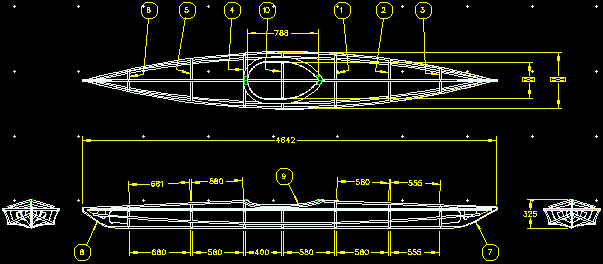
West Greenland Design 1995 (GUM) - A Modified "Hartel" Kayak

The frame contains four sections which are joined by metal joints.
Total length of the kayak is 5.35m and width is 52cm. It weighs 20kg.
The fore and aft sections are assembled separately.
The two middle frames are inserted after stringers
and keel are joined inside the hull.
The frames are made of seven-layered, nine millimeter birch plywood except the two main
frames in the middle, which are doubled to 18mm.
The massive parts are all ash and the gunwales/1st chines
are stiffened by 3mm 6-layered birch
plywood.
The joints are made of aluminium and stainless steel parts
and all screws are made of stainless steel.
Most nuts used are selflocked. All joints are handmade.
The joints for the keel and the joints separating the fore
and aft sections are tightened by hexagon screws.
All other joints are assembled without tools.
The skin is polyester-reinforced-PVC (truck cover) for the
hull and cotton/polyester for the deck.
The hull is made of 3 parts each side (~36m to sew) but the deck is one piece.
The inside of the deck is sealed with a layer of silicone
(used for sealing windows etc.).
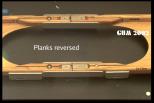
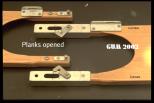
Assembling starts with the rear section inserted first.
This is done because the cockpit coaming is installed with
an angle, which provides a better in and out and
this is valid both for paddler and framework.
A special tightener is used to pull the keelparts apart and stretch the skin. When the
keel is joined, both gunwale-joints are also pulled apart one-by-one and joined.
The stringers are now joined easily.
The last two frames are inserted starting with frame No.4
(backrest) and then No.3 (kneeframe or masik).
When this is done the deck stringers are inserted and the
last thing is to attach is the cockpit-coaming
(steam-bent out of two parts, lip and ring are both ash of
1cm thickness, for a procedure look at
Chris Cunningham's article "Building a greenland kayak" in the 'Seakayaker' magazine).
Assembly time is 35 minutes for me (Gerald).
This is the nicest folding Kayak I have seen so far (Hendrik), the
joinery is a dream:
Stern Joinery

Frame and Gunwale Joinery

Gunwales

Design Sketch
Here is Gerald's original page with more info
on his design.
And here are all available pages:
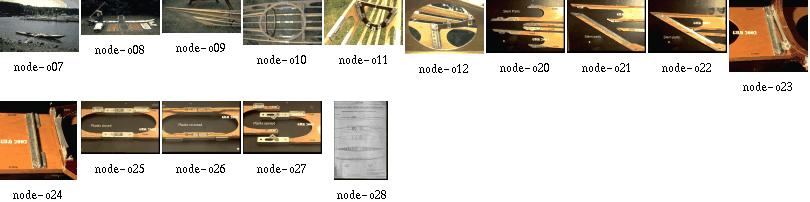
Pat's Design 2002
From the computer into reality

 Well, Patrick's computer design comes out much
nicer than mine did. Congratulations for a good job well done!
Well, Patrick's computer design comes out much
nicer than mine did. Congratulations for a good job well done!
 Patrick built his kayak in his living room. He plotted the sections
to scale 1:1 and glued them on 4x4ft baltic birch sheet. That's why
you see white paper on section backs.
Patrick built his kayak in his living room. He plotted the sections
to scale 1:1 and glued them on 4x4ft baltic birch sheet. That's why
you see white paper on section backs.
Patrick has used a small brass hinge to connect the cockpit halves.
The skin is black and yellow PVC coated polyester mesh 16 OZ, 0.5 mm thick bought
in a truck tarpaulin maker shop. For 100$ CAN he got all needed
fabrics plus a quart of HH-66 vinyl glue.
When Pat has created the DXF the view scale was "1"
so normally when you will print on
a plotter the scale will be ok. But not all plotters
can print that size of paper so to use it
you have to divide in four equal parts and separate
in four different files. Don't forget that little detail.
On vacation in August 2002 Pat went with his friend in their
chalet on the shore of the small lake Dubuc in deep wood on
Mont-Valin a chain of mountain in the north of
Sagnenay river. He is from Jonquiere, a small city of sagnenay
region and brought the kayak with him. First real trial
while fishing rainbow trout and being by mosquito's!
Pat's hull design is made of four parts. Separation approx 1-1/2
feet after stem and stern and one separation in the middle.
He removed all the wrinkles with an iron set to medium
and a cotton shop towel to avoid sticking. This works as well as with a heat gun.
Based upon my own experience, wooden sections are preferable
over aluminum sections because they don't deteriorate
so fast (bending, buckling, denting). HDPE is even more
versatile, but considerably heavier than wood. All in all,
a really good design, especially for the first one you do.
At the left is a pic of a new used hockey bag with all the kayak in it.
Like you see on the pic there is a little measurement error but it is the
perfect bag.
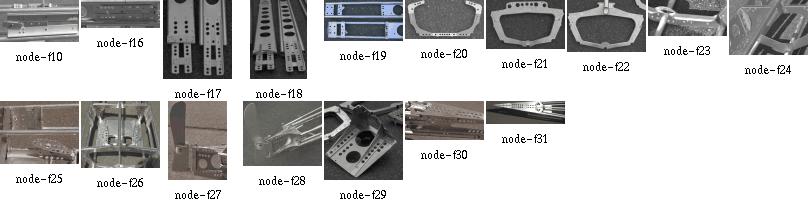
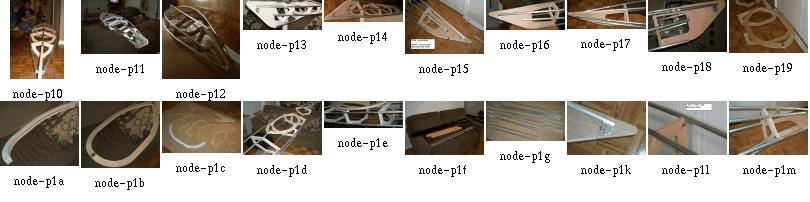
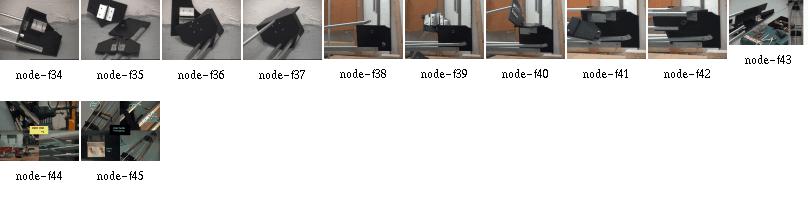
Frame Joints (HHM)
Push and Secure
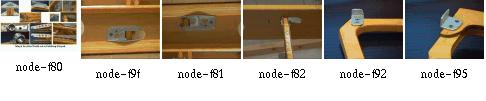
Pull and Secure

Rotate and Lock

This and That

PVC Skin (GUM/HHM)

I keep receiving questions about making PVC skins
and thus have re-edited my comments about it into
a single file that is a little easier to read.
Now you see a mix of four years old comments with very
recent ones.
Questions and comments by others are printed in blue.
The images are clickable and lead to the full-size
(original) pages.
[ Skin Material ]
[ Welding ]
[ Skinning Sequence ]
[ About Tape on a Final Skin ]
[ About Temporary Skins ]
[ Lacing Skins ]
[ George Dyson's Hypalon Skins ]
[ Thomas Yost's Hypalon Skins ]
[ Epilogue ]
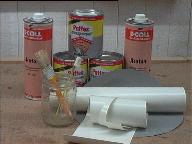 The Baidarka skin is of polyester webbing reinforced PVC. It was strong enough
to withstand sharp rocks on the shore.
This link shows where I got the
idea for the glue mixture. The page is in German,
about the airship LOTTE,
whose skin construction method I have partially copied.
It was built at the university faculty where I was working and someday one
of the guys showed me how to correctly mix the PVC glue with acetone.
Sure enough, they had a clear understanding of the necessary bonding quality.
The Baidarka skin is of polyester webbing reinforced PVC. It was strong enough
to withstand sharp rocks on the shore.
This link shows where I got the
idea for the glue mixture. The page is in German,
about the airship LOTTE,
whose skin construction method I have partially copied.
It was built at the university faculty where I was working and someday one
of the guys showed me how to correctly mix the PVC glue with acetone.
Sure enough, they had a clear understanding of the necessary bonding quality.
In short, the idea about glueing PVC is to
use lots of thinner (Acetone). I had to test the mixture several days and
came out with that it is right when the thinned glue
begins to run off the brush by itself. Then apply it minimal two times to
both surfaces.
After letting the glue get nearly dry, combine the two PVC parts and press
them well for some minutes.
 For the first prototype I sewed two strips of PVC onto a zipper
and glued these zipper strips at the middle of the deck piece. This feature
was as strange as convenient;
it eased assembly and loading of the boat.
For the first prototype I sewed two strips of PVC onto a zipper
and glued these zipper strips at the middle of the deck piece. This feature
was as strange as convenient;
it eased assembly and loading of the boat.
With some grief I dropped this idea and the actual design now has hatches
instead of the zipper. These hatches serve the same purpose except that
it is a lot more difficult to assemble the boat. Also I do not have these
sponsons any more that had to stretch the skin.
Anyway, the www site of STAMOID is
http://www.stamoid.com/stamoid
or
http://www.forbo.com
and they have
some property sheets about that
specific skin material.
The skin comes in doublesided or singlesided
PVC covering on a polyester fabric.
singlesided weighs 280grams/square meter,
doublesided is 430g/m2, tensile strength is better than 1200N over 5cm width.
The singlesided stuff is covered with a dirt protecting
finish, which makes glueing and welding impossible
and thus has to be removed in the contact area.
Paul Raymond wrote:
I stopped at a canvas store today, and he sold me 17 feet of double
sided Stamoid for $100, which I think is a good price. Since this is for an
aluminum folder, and Hendrik Maroske used it with success, hopefully I
will too. I'll find another use for the pack cloth.
Stamoid is what I have used, it comes in both protected and unprotected
versions. I suggest to get the thinnest material available, that is,
I got the 0.6mm stuff and found it too heavy when glued together, so
I talked my supplier into buying 0.5mm stuff for me. There even seems to
be 0.4mm material out there, and a way to get material with defects
(holes) in it (lots cheaper).
This material is so thin compared to my Klepper, how does it hold up on
your boats compared to commercial boats? Do you still prefer Stamoid to any
other material available?
My most recent Baidarka still is the one from the 1999 Toronto trip. The
Baidarka skin was finished late summer 1998 and I must confess I did not
use the boat very much since Toronto. I have moved the workshop since,
and with it the boat, and since that move the lake is a little more
difficult to get to (without car).
Anyway, the pics on this website with
several closeups of that particular skin
have been made during Christmas holidays
January 2002, so you have a guess at how good the skin actually is. It
still looks "new enough", is tough as ever and still waterproof. No seams
broke.
The skin is nearly four years old, the "unprotected" Stamoid, and ready to
go on any trip. I'm satisfied with it. Always cleaned stains before they
could wear in (with water only), because without the protection I am afraid
to use chemicals to clean the skin.
I see that Tom Yost used polyester material, and then
coated with hypalon, which worked well for him, but I wanted to avoid
having
to use toxic coatings, and the pvc material seemed quicker to skin.
To each one his way looks as the best afterwards. But
I would still do it again. It took some time to learn
to use a good balance of techniques, stitching, glueing,
welding.
Basically, my experience with Stamoid and Pattex and
Acetone is that if the glue doesn't hold within the
first five minutes, it never will. Throw away the pieces
that you can and restart. If it holds, it always will.
And by "holds" I mean you rip the pieces apart and not
the glue fails, but the Stamoid goes apart.
Practice good bonds before doing the skin.
And even more basically the only advice I can give is to
really
do a few practice runs on the stem and stern pieces
with the intention to keep them as samples. This will pay
out in the end.
Use double sided tape for
the first practice run to have a good chance to rearrange
things and if you don't want
to wait for the glue to settle.
And, talking about abrasion, I cut Stamoid in strips and
these were formed with a heat gun to match the curving
of the hull before glueing them on over the stringers
and where the skin pieces meet.
Generally the heat gun helps a lot to smooth out the
results. Afterwards, the warm material is perfectly
dry for glueing. It seems that there is some amount
of (water or other) thinner in the skin that works
against a good bond. Seems to be the stuff that makes
the PVC soft.
Now, one of the bottlenecks in using such material is an effective
glueing process. Here in Europe we are using Pattex transparent glue
which works effectively on soft PVC and does not harden to brittle.
There's different stuff available for glueing non-rubber zodiacs. 2-Komponent
and stays flexible, although quite expensive
Welding is used only in professional applications for truck and tent
awnings. I got caught by approximately 3mm material shink per meter as I welded the 5
seams in my hull. Makes funny waves in each section. Took me some time with my
heatgun to shrink the whole skin, to take the worst away. :-(
Amateur tools for welding soft PVC without glue, just fabric on fabric,
are air guns or the like. Their actual use and temperature
operation range seem to fit. Use a rubber wheel on a stick to
press the layers together. When it becomes black it's too hot...
The professional heatgun that I used only melted the pvc surface without
allowing for sticking. Something obviously wrong in my procedure.
Welding was Gerald's idea, and for him it worked. My (Hendriks)
heat gun did cause some degree
of sticking, but not enough to really call this welding. It
depends very much on the quality of the skin. If there is
anything like "abrasive protection" or "dirt protection"
put on it, forget about welding.
What becomes black ?? PVC does not seem to change any colour. Is it the
glue??
I guess that Gerald was joking. My white PVC just got darker
and started fuming. Then it's time to rapidly stop heating.
Final question not yet answered: do you stitch only for keeping the
pieces together ? In other words, does the skin in its final version rely
only on glue lines or is it glued and sewn. I could not really get this
out of your description in previous postings.
In my case, stitching was used until the glue bonded
permanently. After that time (some 15 minutes), the seams
were removed where possible.
All your help is precious: I have just bought wallpaper and a range of
water based markers to start the skinning job.
I got the
wallpaper trick from Gerald, and it's worth it. You'll
easily see how it will be with the PVC, since PVC
doesn't have much more stretch than the wallpaper.
One thing about heat gunning:
I never was able to really shrink the skin. It's more like
rearranging it to stress, so that folds and waves remove
themselves. If you would really _stretch_ it with heat,
it will cool off and then be over-stressed and floppy.
So, I used the heat gun only for aesthetic corrections,
not for shrinkage.
Paul Raymond wrote:
Has anyone else had any luck using pack cloth, which comes coated one
side and dyed, and adding additional polyurethane?
Michael Daly wrote:
I have never tried, but wouldn't bother. Coated pack cloth, in addition
to having a urethane coating on one side, has a durable water repellent
coating on the fabric as well. The purpose of the latter is to prevent water
absorbsion into the thread and so enhance its waterproof properties.
I'm willing to bet this coating is what prevents a good bond with the
subsequent polyurethane coatings you apply. You need an uncoated fabric to begin
with, or at least one that has only a "coating-friendly" treatment applied.
Preventing any good bond, exactly. I had oversensitized my right thumb from
rubbing the material with Acetone to remove the protection from the glue
areas. Definitely NOT the way to go. Although the coating really is good,
waterproof and repelling dirt.
Stefano Moretti wrote:
I need much help from more experienced skinners. This will be my first
attempt. I've finished the frame od the foldable with much satisfaction. It is
not wobbly as when I first started.
Congratulations! Now proceed to game level 2 :-)
1) Make hull and sides from one single piece, cutting "V" shaped slots
in bow and stern. Seen this picture in FOLBOT virtual company tour.
No way.
I also tried this.
It is better to do
it right, from the start on. Buy a roll of wallpaper
and make cutting patterns. Cut the patterns in
stripes following the chines, guns and keel.
 Why?
Why?
- the "easy attempt" in the long run was more work!
- at the "V"s, the skin is glued and thus becomes
more rigid than everywhere else; and thus also,
- at the "V"s, because of the overlappings that add
material and glue, the skin prevents itself from
folding nicely (more material to fold).
2) Overlap hull and deck skin over the gunwale chine by more than one
inch
Again, its better to go right through it: begin with
a large overlap for sewing and then cut it small before
glueing. The skin is not easily folded with such thick
glue strips.
From my experience, I consider everything too thick that is
overlapping more than 3/4 inch or has more than two parts
overlapping at the same area
3) cutting deck from mid cockpit to bow, and from mid cockipt to stern,
so to reduce the wrinkles and dragging all error towards the cockpit
area where the big hole would accomodate much wrinkling. Done this with
3 mm plywood in clc kayaks, should work.
The less glue strips (rsp. easier folding), the better. If you go
without deck ridge, there's no need to go with the deck seam.
Always proceed to the ends rather than towards the cockpit.
Otherwise, you end up having a slack skin at the cockpit.
4) for all unexpected problems and some extra stiffness (still very much
debated I know) I would add two small section sponsons just below
gunwale.
In my case, both designs worked well. Especially with cold,
wet skin, sponsons give you the chance to re-stretch it.
How do you cut and glue around the Aleut stern.
- glue a 10cm wide strip around the hull near the stern,
as an anchor for the remaining work. this anchor is
secured with stiched seams and tape, to be unmovable.
- glue 2in wide strips around keel and deck stringer
edges, to the 10cm strip, as anchor.
- glue an 1in wide anchor strip from the outer upper edge of the
deck, where the gunwale ends, down to the keel in a nice
forward angle, as a provisional guide for glueing the
remaining skin
- Glue 2inch wide horizontal strips of PVC from the 10cm
wide anchor to the stern end, one atop the other, like
shingles on a roof. Begin at the keel, end at the gunwale.
glue to the 1in anchor as a guide.
- Remove the 1in anchor strip
- sew one deck piece to the work
- lash a thin tube vertically to the stern end
- glue a 2in wide strip over the stern end, covering the tube
- Glue 2inch wide horizontal strips of PVC from the 10cm
wide anchor to the stern end, one atop the other, like
shingles on a roof. Begin at the keel, end at the gunwale.
Glue over the previous set.
Now you have a nice rudder hinge, secured in the skin.
- Now skin the boat and in the process glue full length
over the stern piece keel seam, making it watertight.
First I make the stem and stern pieces
and
temporarily attach them onto the frame. These
are made out of 2in wide PVC strips and a
few larger strips.
Making these end pieces helps a lot in
acquiring the skills to work with PVC.
Throw away a piece if you are not satisfied.
The next one will come together a lot quicker.
Having made a pair of useful end pieces,
the large skin panels
are glued over the end pieces, and when
all the skin is done I add a nice looking
finishing layer over
the end pieces, smooting out the curvature
and hiding all the seams, glued patches
and the rugged connection between skin and
end piece.
After having made the skin, I
rip out the innermost PVC layer of
the end pieces, thereby ensuring that the
stem and stern will always slide into them
without too much trouble. So, the very first
PVC layer for these pieces is attached only
very temporarily, with double sided tape
or masking tape.
Do your PVC skins have a seperate panel for each Keel to chine,
Chine to gunwale, and gunwale to deckridge, or are you able to
cover greater areas at once?
Greater areas simplify nothing. They make things more complicated,
and if something goes wrong, you'll have to throw away more skin.
My boats have fairly high gunwales, more like 'planks'.
The sequence is like this
( I began inside-out, here's a sketch, but that is not
absolutely necessary):
- preparation: skin the stem, stern and cockpit areas
- tape two keel pieces onto the frame (inside-out)
- sew two middle pieces onto the frame inside-out
- glue the middle pieces to the keel pieces (inside-out)
- sew the keel pieces together (inside-out)
- cut the keel seam flush and turn the skin around (hope it's symmetric!)
- cover the keel seam with a rub strip
- glue the gunwale pieces on
- slightly weld PVC strips with heat gun over seams
- rip strips off, glue them on
- sew one single deck piece from gunwale to gunwale, stretching it
slightly, starting from the ends, working to the cockpit, one piece in front,
one aft of the cockpit, temporarily holding the skin with tape and seams
- glue them on, removing temporary seams and tape
- remove frame out of skin
- cover seams inside skin with rub strips
- important: _NO_ glue area wider than 3/4 inch! not less
than 1/2 inch either! wide areas tend to disintegrate
easier, yielding very stiff joints.
What weight PVC would you recommend ?
The thinnest/lightest you can get. I have used .6mm thick stuff and next
time will definitely use .4mm instead. Because every seam
doubles the thickness, and together with the glue it really
gets stiff. If you expect trouble somewhere, use the thinnest
stuff you can get and apply strips wherever needed. The
procedure for the stem/stern I described yields very stiff
results.
From now on I assume that you have made
a set of good end pieces and are ready to skin.
PLEASE, use wallpaper for making cutting templates.
Cut strips aligning to chines, guns and keel.
(in my case, 6 strips + 1 deck strip). By any means make
strips the whole length of the boat. Leave out cockpit rim.
On the inverted hull,
sew together the two strips that meet at the keel and go
up to the chine stringer.
Sew strips loosely together using 1 inch spacing between
seam stitches. Sew only where PVC is cut away anyway. This
routine worked best for my Greenland Baidarka with only
one chine stringer and the gunwales having an upper and a
lower stringer.
I used a twohole punch to make a row of holes at a long side of a large
piece of PVC and temporarily sewed it directly onto the frame
prior to glueing it to other pieces. This way I could reduce the count
of folds in the skin.
Sew the two strips that go from guns to chine to the
ones you just sewed together, leaving off the stripe
between lower gunwale and chine and thus using large
seams over the hole (stitches 5-7cm apart).
Loosely attach the previous mentioned strips to the
guns (stapling them on wood frames, using tape
on aluminum) and rotate the hull
Sew on the deck strips with a rough seam, stiches
some 3cm apart
Use heat gun to remove wrinkles everywhere. Rotate hull.
Use heat gun to stick (weld) the remaining two strips
to their place between the lower guns and chine stringer.
Remove the large seams under the two newly attached strips.
Use heat gun to partially lift off those strips and reattach
them without wrinkles.
Lift one yard of each strip, clean contact area thoroughly,
apply "hendrix mixture" and glue them together. Make sure
glue line is only 1.5 - 2cm wide. Glueing procedure
described later.
Work towards the ends of the hull, cleaning and glueing.
Let the glue dry. Cut excess skin at the newly made joints.
Use heat gun to remove wrinkles. Do not generate excessive
heat at the glue strips!
Redo the keel seam (the butt type, not overlapping!).
Now space the stitches 1cm apart. Cut excess skin.
Now the borders of the two skin strips just touch each other.
Use heat gun to remove wrinkles at keel area. Cut keel strip
(3cm wide) and lay it over the keel. Use heat gun
to smooth it over the keel's curvature.
Remove keel strip, clean keel line, 1.5cm in each side
(=3cm wide total).
Remove keel seam for two foot length, glue the keel strip
where the seam was, to make it watertight.
Redo gunwale seam. Proceed as with keel.
Glue small horizontal skin strips over the bow and stern
to generate the Baidarka's extremities. For Greenland
Kayaks, much less work since larger patches usable.
Cut and seal the cockpit area.
Don't forget to make sure there is no "protective impregnation"
of some sort over the PVC. Otherwise, you get lots of
additional work to clean the glueing areas.
Be meticulous at the cleaning operations.
Always make test specimens and rip them apart to see
whether the glue mixture and/or cleaning operation
was successful.
Well, "hendrix mixture" goes like this:
- thin the glue until it quickly runs off the brush by itself.
- thoroughly mix
- apply three times, let dry after each application
- contact the parts
My glue is the
German "Pattex Transparent",
thinned with Acetone.
You might want to ask my brother Gerald, who is a chemistry
professional,
what the american equivalent is.
I put a rub strip over every seam and have had good results.
In my first attempts, I also have put rub strips inside
the skin; this is not so good, since skin folds less
easy, is more heavy and tends to develop folds. Also
I simply cannot glue well on the frame from the inside.
Kirk Olsen wrote:
The thought of a double sided
tape holding the deck seam together instead of sewing is intriguing.
On my first foldable Baidarka, the double sided tape that had to closepart
of the
deck seam and seal it watertight, became an ugly black
smeary, slimy thread after a two-week saltwater session. I'll never
do this again...
Before doing the skinning process, some kayak builders
wrap their new kayak frame
in clear plastic and try it out to check if the design
has any obvious flaws. For example, trim problems; that is, if the seat is
too far forward or aft. Or trouble just getting into
the thing, happens all the time. At that stage, it still is easy
to modify anything.
Now, it seems that most of us
just try with the expensive skin (me included),
ignoring the possibilities of
tape (although I tape virtually everything)
and clear plastic. I just always had tried to avoid the
additional work involved.
But that can be real fun; here is an account
of what can be achieved, if you really want.
Tom writes:
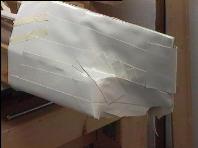
This temporary folding skin is made of PVC to test the
viability of the material as a one piece hull.
In this test, I've pulled the skin fairly tight using
squidding line but am careful not to
over stretch. There are still a few wrinkles in the
skin, but to this point no heat has
been applied. The "Real" skin will be made of higher
quality, thinner, Stamoid PVC.
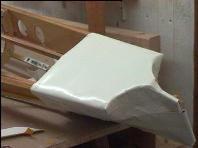
This is a good picture. I have seen this quite often
with my own first PVC skins.
My own experience at working with very large
PVC skin panels is that bulges develop at the
few remaining seams which show that the skin doesn't
fit closely. These bulges were quite sharp since in
the other places the skin would
fit very smooth. Afterwards it was impossible to
remove these bulges.
If you look closely, you will see the vertical
folds in between the gunwales and stringers. This is
exactly the problem zone, they tend to concentrate
right before and after the cockpit. On the other hand, the
keel area looks good... how about a single piece
for both keel panels? Now, the keel needs a rub strip
anyway, so there is also no real advantage in doing
it in one piece. Doing it in two pieces yields much
smoother stem and stern parts. You will find that
narrow PVC panels are much easier to work into a
pre defined shape.
My own conclusion is that a one-piece skin is
perfect for testing the frame before doing
the final skin. This one took less than three hours
to make. Very motivating.
Tom writes:
I still feel that a one piece PVC hull is workable, as it has been
done by others. The problem I had was trying to do it with Stamoid.
The black PVC had
multidirectional cloth , the same that I use on my sewn skins, so it had
the ability to conform to the stringers. I didn't have enough of it for
the entire boat so I
purchased Stamoid thinking it was made the same way. It wasn't.
The Stamoid has unidirectional fibers which would only conform
in one direction, so it wouldn't take the shape of the hull
without getting all wrinkled at the stringers. In addition, and
the thing that bothered me the most, was the fact that the Stamoid was easy to tear when I
pulled on the stitching that I used to stretch the skin. This
happened in only one direction , parallel to the fibers.
I've never had a skin material
tear before, so it really caused me concern.
About the Stamoid tearing easily when sewn; that is a good point.
If I recall correctly, the thicker 0.6mm variant would not tear as easy as the
0.4mm one. Anyway, I had no other comparison and was satisfied with
the 0.6mm stuff.
Although I have never seen a skin tear on my boats, even on tar or stone beaches. And
back then I simply took it as normal, but shame on me, I have
used only a small amount of really thin Stamoid, mostly using
the 0.6mm material.
I stand corrected in having said the
thinner material is better.
Maybe the thicker material has a stronger cross weave
respectively more cross weave?
Here is what I found today, 28OCT2002 when measuring the
tearing resistance with a thin line that I would
use for sewing the skin (25kg test Dacron). I punched
the "sewing" holes an inch from the border and an
inch apart:
Direction crosswise to roll length (in roll axis):
20kg,18kg22kg (average=20kg)
Direction following roll length, that is, the fibers,
if fabric were of unidirectional fibers:
12kg,14kg,20kg (average=15kg)
To me the difference doesn't look so alarming, but
yes the Stamoid actually is not at all multi/bi directional.
During my boat building runs I noted a rather large
variation in quality even in a single roll. Also,
the material sample I just have tested is 0.55mm thick instead
of the supposed 0.6mm. The resistance to tearing with
a strong line also varied a lot and was kept at bay
in using a small distance between stitches. In the
end I glued everything anyway. Also I used to use a
thinner, weaker 10kg line that would rupture before
the skin would tear and would not interfere with
glueing.
I never could achieve anything with "lots" of heat shrinking
on Stamoid. Only with narrow strips that were formed with the
heat gun. Heat only re-aligned the weave within the PVC very
lightly.
I also have heard of several people trying a one-piece skin,
but my own results were frustrating (see above).
See here for Patrick Poirier's results.
I know several people who have used hypalon on folding skins and I
haven't heard complaints. Of course, commercial folding kayaks and most
inflatable boats also use hypalon coatings, but those are impregnated
under pressure and thus bonded more completely. But it is a good sign
that the river rafting industry has stuck with hypalon for at least 20 years.
I should have all kinds of free time since I finished my new book, but I
still haven't found time to revive the BHS. Fortunately, the skin boat
revival has a life of its own, and is doing fine.
There's an excerpt of my new book, with discussion, at:
http://www.edge.org
best wishes,
George B. Dyson
 Click here for a
view of a Thomas Yost's design for a folding Hypalon skin.
Click here for a
view of a very easy method of lacing the skin to the frame.
My first Baidarka skin had so many wrinkles
that when we entered the beach someone asked:
Click here for a
view of a Thomas Yost's design for a folding Hypalon skin.
Click here for a
view of a very easy method of lacing the skin to the frame.
My first Baidarka skin had so many wrinkles
that when we entered the beach someone asked:
"what's that"
I answered "my boat".
"a boat?"
"yes. It's a Baidarka." Having said that I thought he'll
ask something about what a Baidarka is. Especially some
question about that bow. Instead came
"why'd you wrap your boat in plastic?"
Click here for
Thomas Yost's design with a folding
hypalon skin.
Click here for a
view of a very easy method of lacing the skin to the frame.
Roy Clo Baggerly's Designs
Paddles (Gail.E.Ferris/TDY/GUM/HHM)
Gail Ferris' paddle drawings are barely visible in
thumbnails, but worth looking at in fullsize!
Paddle Drawings by Gail Ferris:
Curved Bone Up
Ilulissat 1 bone edge
Ilulissat 2 bone edges
Kitdit Vestejland
Lars Jensen
Nathanial Jensen
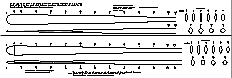
Neils Moller
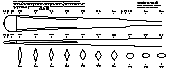
Odense Upv 97
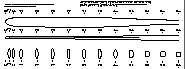
Weathered Upv 97
Folding Baidarka and Greenland Kayak Design, Hints and Tips
What you're looking at is just an overview
with a few interesting images.
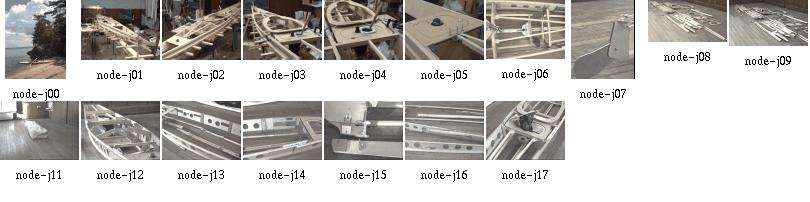
Here is more info on all our folding Baidarka designs:
[Design]
[Construction]
[Parts]
[Joints]
[3-D]
[Complete Framework]
[Skin The Frame]
[Stem]
[Stern]
[Rudder]
[Gunwales]
[Frames]
[Stringers]
[Cockpit]
[Materials]
[Pump]
[Sail]
[Paddle]
[This And That]
Well, the basic folding boat design procedure goes like this:
That was actually step one.
- Find out that the boat will not disassemble.
- Repeat step one until it does
That was actually step two.
That was actually step three.
- Now try to disassemble the boat within the skin.
- Find out you will have to cut through parts to do it.
- Repeat step three until you get the boat apart without
cutting parts or your fingers. Check for bloody thumbs.
That was actually step four.
- Now we have a boat that can be disassembled.
- Assemble it [Lostsoul: Animated Assembly Video]
- Find out you can't really do it in less than eight hours.
- Repeat until you can.
- Try to pack the disassembled boat in a suitable bag.
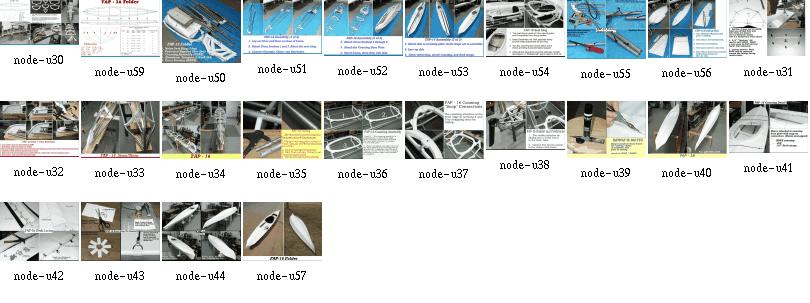
[FAP-16: Folding the Skin (TDY)]
- Find out you can't.
- Throw the whole thing outta the window and goto step one :-)
Still reading?
We actually have managed to collect a few useful design and construction tips,
and the purpose of the design page is to divert you into the appropriate sections, depending
upon your preference.
Since this is a 'crosswise' entry,
you will have to use the button to get back to
the design page.
Design bits and pieces:
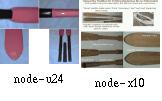
SPY-10 Sailrig by Thomas Yost
Dyson Style Two-Seater Folding Baidarka by Thomas Yost: Seat and Frame
Zippers: Easy Loading
Deck Ties
Skin Quicklace
BIF-16 by Thomas Yost: Perfect Bow
Sliding a Curved Bifid Bow Into The Skin
Oval Aluminum Tubing
Thomas Yost: Bending Tubes
Bending Aircraft Tubes at Mark Smith's Shop
QUESTION: Pin Joint for Stringers
Skin Cutter
The PVC Glue
Kayak Camping: My Sail is My Home (Ready for the Night)
Epoxi
Rudder Pedals After Use
Simple Carrying Toggle
HDPE Trial Design (HHM)
 This one is currently under development. I try to
follow Tom's philosophy of not doing anything that
can be done easier. We'll find out what the
result is. One disadvantage will be a comparatively
high weight. One advantage already is a very
short construction time.
This one is currently under development. I try to
follow Tom's philosophy of not doing anything that
can be done easier. We'll find out what the
result is. One disadvantage will be a comparatively
high weight. One advantage already is a very
short construction time.
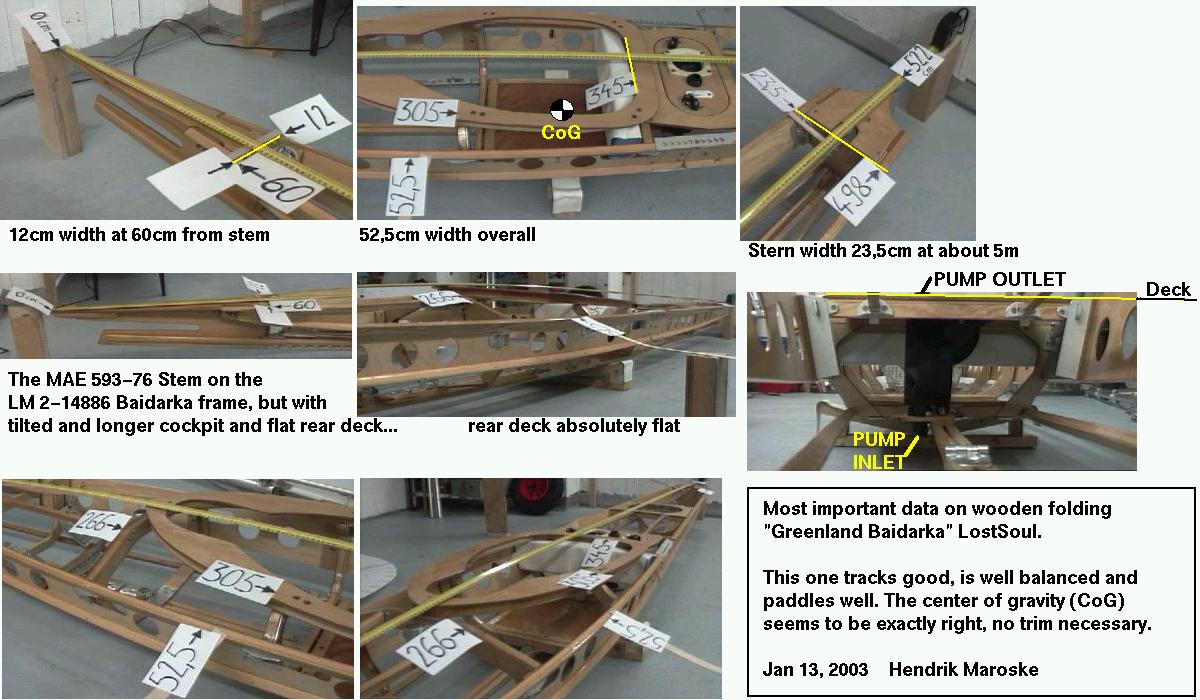
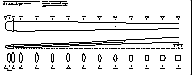
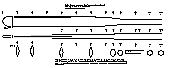
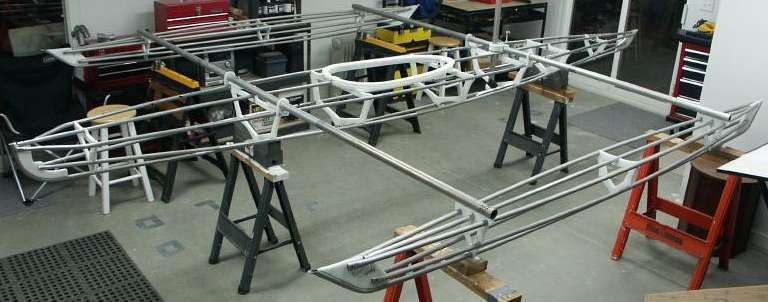
Measurements (TDY/HHM)
 Perhaps the only advantage of a folding kayak is that I can compare
the bare frame against the complete kayak any time. Although the applied loads
seem to have been too small to generate the results I would have expected, I can
assure you the flex of the assembled folding baidarka is adequate for good
paddling characteristics; so, if you should ever repeat these measurements
with your frame, if you end up with what I got, it is no guarantee for success,
but at least a hint that you are not completely off the ballpark.
Perhaps the only advantage of a folding kayak is that I can compare
the bare frame against the complete kayak any time. Although the applied loads
seem to have been too small to generate the results I would have expected, I can
assure you the flex of the assembled folding baidarka is adequate for good
paddling characteristics; so, if you should ever repeat these measurements
with your frame, if you end up with what I got, it is no guarantee for success,
but at least a hint that you are not completely off the ballpark.
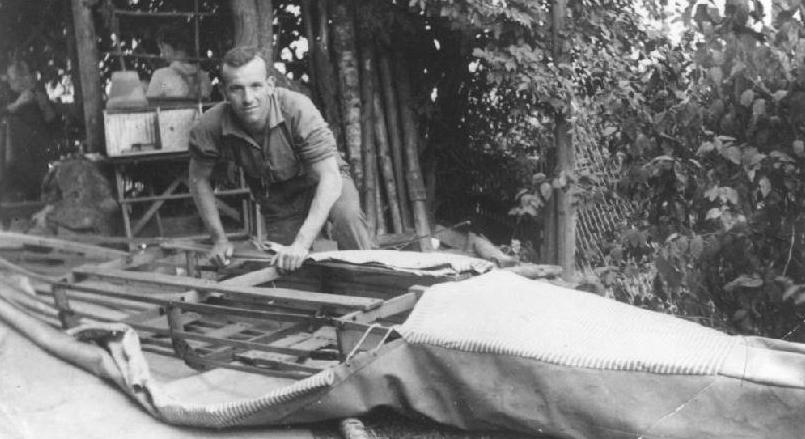
This is my grandpa Martin Seeger with his folding kayak,
assembling his own design. He is
not exactly a contributor to this page
but my thanks go to him anyway. He'd have a
lot of fun with this page...
This pic is dated about 1928, for all the folks who think
they invented the folding kayak :-)
well, that's it :))) Tonight for the first time I disassembled the
Folding Greenland Baidarka from within its skin and was able
to get all parts out if it :)
Well, nearly all... I had overseen a tack which permanently
fixed the skin to the keel right where the rudder is and where
nobody can reach the tack to pull it out! The good part of the
story is that I have sewed only partial deck covers. I will
not glue the final deck cover onto the skin before the cockpit
sock is ready and the equipment bags have been fitted to the
hull form and attached to the hatch closures. So, for quite a
while, the Baidarka will stay without the final deck cover. This
is no problem since I already have cut the piece and can glue
it on within an hour or so.
With my aluminum Baidarka, the first disassembly
was more of a disaster. I had skinned it over the xmas holidays
while my family was out. The Baidarka occupied our whole living
room. Two hours before my family returned, I was ready to
disassemble. It did not work. A stringer was fixed by the skin
and could not be removed without sawing through the aluminum
tube... I picked up my wife and kids, and they went in and
I brought their luggage up and carried the Baidarka sack down,
living room looking a bit untidy. That was a close call...
Anyway, here is how my brother Gerald and I
have once assembled our kayaks in the field,
entertaining the whole small village for
the best part of a whole sunny day:
SPY-10 Folding Sailrig (TDY, Oct 2002)

This sailrig is designed for use with FAP-16. It can be
adapted to other folding kayaks with minor modifications.
The amas are constructed using aluminum tubing, HDPE Cross
sections, and a nylon/neoprene skin.
This ama design is based on, but not a copy of, the Chesapeake
Light Craft Eight Footers that appear
in Woodenboats #131, July/August, 1996. The CLC amas are
made of plywood and feature a "V" shape cross section.
The SPY-10 folding ama utilizes aluminum tubing with a
nylon/neoprene skin. The cross sections are "Hard-Chine".
The amas are 10 feet long to approximate other designs currently in use.
With 3 cross section and 3/4"X.035 tubing, the amas weigh
7lbs. each. Estimated weight with Nylon/Neoprene skin is
approx. 10lbs. each. The 120lb. displacement figure is at point of submersion.
The twin 10 foot akas are made of 1.5"X.049 tubing
and break down into three sections. The center
section is 4 feet, and the outer sections are 3 feet each.
There are two 27" inserts per aka, which are made of
1-3/8"X.058 tubing. The akas are spaced six feet apart
as Tom felt that was a minimum distance for paddle
clearance.
Tom's workshop is pushed nearly to it's limit when the sailrig is assembled.
Transport (GUM/TDY/HHM)
These are boats (and nuts). They fly and ride trains and buses at no extra fee
(the boats, not the nuts).
Carrying the kayaks in airplanes, trains, buses and taxis was no problem;
all american transportation had facilities to handle bags of that size.
Even with the Victoria Clipper, from Seattle to Victoria, this was no problem,
although they had all their staff carrying our luggage on board. It might
become one, when everyone tries to carry luggage of that size...
Baidarkas and Motorcycles (GUM/HHM)
What has a motorcycle to do with kayaking? Easy: the taxi driver
very kindly drove us around with our large heap of luggage.
He is a Harley Davidson expert and might have all the parts you
need for your pre-war bike. We had some time left when we were to
go to the ferry, and instead of just dropping us off, Tony showed
us his workshop.
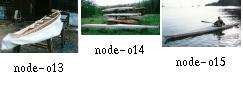
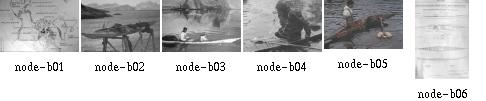
Geralds and Hendriks Vancouver Island Trip 1995
The Lightest Breeze
The Lightest Breeze Enters My Mind,
And All Before Is Left Behind.
For It Is Not Fate That Brings Me Here,
But Rather A Need, Perhaps A Fear.
The Winds Of Time Have Happened By,
And Left Me With This Clear Blue Sky.
The Ocean Swells Do Comfort Me,
The Waters Glow, My Light To See.
For All That Is Will Always Be
Deep Inside A Part Of Me,
Until My Life Upon This Land
Assumes It's Place Amongst The Sand...
T.Yost
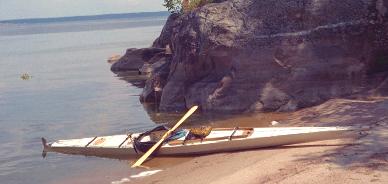
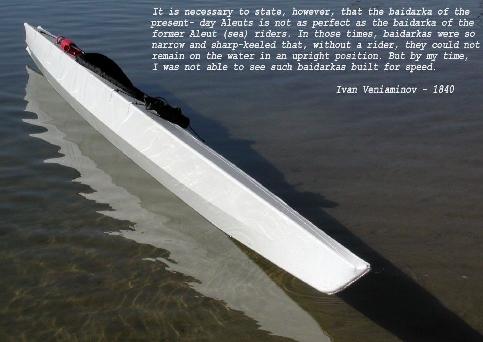
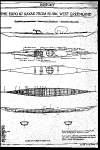
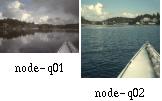
George Dyson's ''Mount Fairweather''
Baidarka was launched in June 1975 at
Vancouver City and some days later made its way up to northeast
Vancouver Island. The summer
solstice of 1995, nearly exactly 20 years later, my brother Gerald and I enjoyed a trip
to the Discovery Islands. This trip also was a test of my brother's newly built
folding Greenland Eskimo Kayak.
We crossed paths with George Dyson's and similar
expeditions. In part, that trip was a sort of a ''dream-come-true'';
inspired by our reading and re-reading of George's and Kenneth Brower's
books.
Compare the characteristics of our kayaks and
let me point out these inspiring journeys,
so much more than what we have achieved:
 Paul Caffyn circumnavigating Australia in a Nordkapp, which is the glass
version of the Greenland design.
Paul Caffyn circumnavigating Australia in a Nordkapp, which is the glass
version of the Greenland design.
 George Dyson paddled the Inside Passage in his version of the
Kodiak designs (Aluminum/Epoxi).
George Dyson paddled the Inside Passage in his version of the
Kodiak designs (Aluminum/Epoxi).
Kayak Surfing (GUM)
Kayak Fishing (GUM)
Kayak Camping (GUM/HHM)

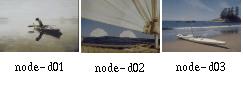
Trip to Norway 1997 (HHM)
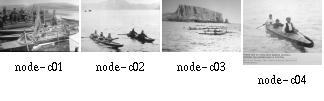
Trip to Toronto/Lake Huron 1999 (HHM)

Perfect paddling weather. The way I got there was this:
on a Friday noon I was working in England on a piece of software.
Already a taxi was waiting to take me to the airport. At the same
time, one of my bosses showed up with a commanding voice
and a ticket to Toronto. So I repaired that code, got my plane home
to Germany that Friday, packed the Baidarka on Saturday and catched
the plane to Toronto on Sunday, showing up on the check-in with a previously
undeclared bag of 2m times 50cm times 30cm weighing 90 pounds.
It was an eventful check-in, but eventually the bag got on board
for about 200 US dollars.
Nearly two weeks later, still in Toronto,
I managed to get a long weekend off, but I would only know that
I am off when I already sat in the car, driving north. Whew.
Epilogue
Dear Friend, now this is the end of our
story. It started out as a dream and now
has become reality for us. That other
reality that we have to live in is
already waiting for us to return to.
Ode To The Lethargic
Cast Upon This Hapless Isle
A Pencil In my Hand.
Sitting Here without a Smile
Feeling Bored and Bland.
Wondering why it is this way
Spending Time for Naught.
Wasting The Best Hours of the day
Knowing my Soul is Bought.
For Working Here Is Life Passed By.
Freedom Traded For A Clock.
I'd Rather Be Sitting Under a Tree
Staring At a Rock.
Contributed by Thomas Yost.
Contributors to this page:
Thomas Yost (TDY), Patrick Poirier (PPR), Gerald Maroske (GUM) and Hendrik Maroske (HHM)